
For the second part of my three part series on Sushi or, if you prefer, Japanese food, I give you my all time favourite dish: Spicy Grilled Tuna. Now on this I have to give my sister ultimate credit, for she managed to figure out the seasoning and dipping sauces just by ordering this dish a million times in her favourite Japanese Restaurant and tasting it over and over. It is spot on and absolutely delicious. The dipping sauce is more of list of ingredients than a recipe though, as everyone will make it differently. Start with a base of Japanese mayo, add enough shiracha chili sauce to make it spicy enough for your taste and then add the vinegar to thin it out a bit. You can’t go wrong with this dish, it’s just mouthwateringly good. I couldn’t wait to get my hands on it when it was finally ready. It was gone in about 30 seconds. What? I savoured it.
A note on tuna though, if you’ll lend me your ears for a minute. Tuna is an abudantly overfished species the world over. Some large bluefin tuna can catch up to $100,000.00 at the world’s largest fish market, Tsukiji, located in Tokyo, Japan, where it will be destined for sushi and sashimi. In North America, there is little bluefin available, and it is not sustainable at all. Here in Canada, Seachoice (a seafood sustainability reference) reccomends the following tuna for consumption:
- Albacore Tuna (AKA: Tombo, canned white tuna and Shiro Maguro), buy Canadian Pacific, US Pacific or Hawaiian Troll or Pole caught only.
- Yellowfin Tuna (AKA: Ahi, Maguro, Toro), buy International Atlantic Troll or Pole caught only
Avoid Bluefin entirely, as it is extremely overfished. Also, I just wanted to make a note about the Tako as well. Octopus caught in Hawaii is the best choice, as most octopus fished internationally is caught by snaring with hooks. Poor regulation leaves researchers with little knowledge of whether or not octopus are being overfished. Be careful of the seafood you buy and be aware of where it comes from.
The tuna in these pictures is yellowfin, a product of Thailand. I can’t say it is sustainable, but I can say I didn’t buy it. I try to educate my family as much as possible on the sustainability issues facing our oceans, but one can only do so much. Also, my sister lives in the desert and is addicted to sushi, she buys what she can get.
For more information, visit the following websites:
http://www.montereybayaquarium.org/cr/seafoodwatch.aspx
http://www.seachoice.org/
http://www.montereybayaquarium.org/cr/cr_seafoodwatch/sfw_recommendations.aspx

Spicy Grilled Tuna Steaks
For Spice Rub (makes enough for 6 small tuna steaks):
1 Tbsp Cumin
1 Tbsp Dry mustard powder
1 Tbsp paprika
3 Tbsp Prepared Hot & Spicy Taco Seasoning mix

1. Mix all ingredients together.
2. Dry tuna steaks and apply dry spice mix to both sides, coating well.
3. Sear on very hot, dry, non-stick pan for about 20 seconds per side for rare.
4. Remove from pan, slice on diagonal and serve along side spicy dipping sauce.
Spicy Dipping Sauce:
Japanese Mayo
Shiracha Chili Sauce
Seasoned rice vinegar, preferrably “Marukan” brand

1. Mix ingredients to taste.
2. Should be a very creamy sauce that is as spicy as you like it, vinegar is minimal and is more for consistency.
3. Allow to rest and serve along side Spicy Grilled Tuna Steaks.
Don’t forget to come back in the next few days for the last edition, sushi rolls!
This post marks the beginning of what will be a three part series on Japanese food. First we will see Sunomono Salad, then Spicy Grilled Tuna Steaks, and finally rolls. Where did this sudden burst of exotic flavour come from? My sister. An avid sushi restaurant junkie for years, my sister soon learned her favourite flavours and soon devised ways of making them at home. Soon after discovering her abnormal love for the Eastern flavours, she ended up moving to Baffin Island. If you don’t know where this is, I don’t blame you. I will give you a hint though, Arctic Circle. It is located in one of Canada’s newest Provinces, Nunavut. Nunavut means “our land” in Inuktitut, the native language of the people in the Northern part of Canada. I’ll tell you another thing about Nunavut, it’s freakin’ cold, and there’s nothing there. Believe me, I visited…in October.
Let’s just say it became a little difficult to acquire the means to make sushi while in such an unforgiving land. I ended up sending “care packages” to her, which consisted mostly of rice vinegars, organic foods and rice. Food’s not cheap when it has to be shipped on cargo vessels when the ice melts.
In any case, my sister survived and has now moved to the desert, another place where it is difficult to acquire seafood. But being on the mainland of Canada, things can be had for whatever price you are willing to pay. And so the sushi obsession continues. I’m not complaining though, I get to eat like a Queen, and I don’t have to cook anything.
Come back during the rest of the week to see the reaminder of this meal!
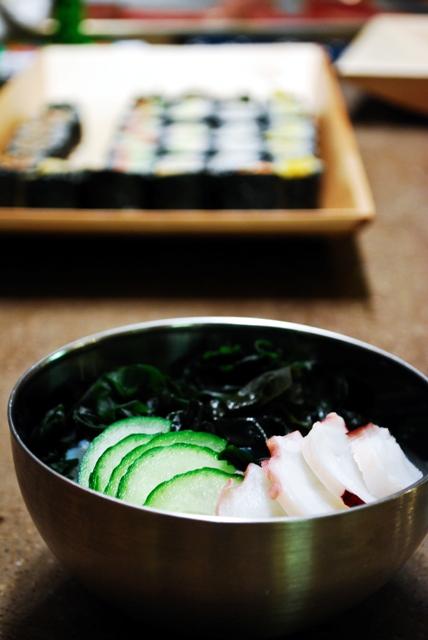
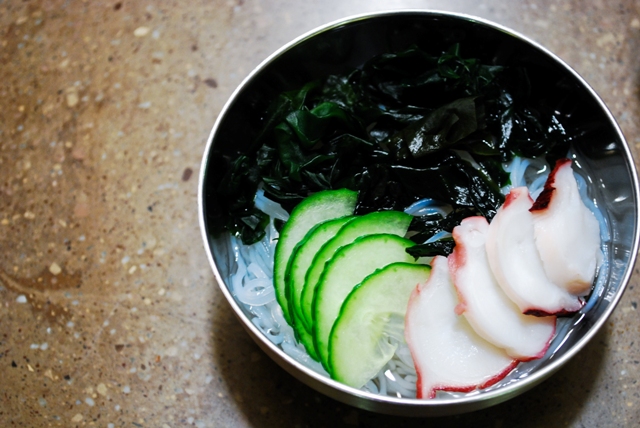
Tako Sunomomo Salad
*Amounts will vary depending on servings needed
For noodles:
1. Boil 1 litre of water. Add “Mizkan” brand rice noodles or Japanese vermicelli.
2. Cook until just softened. Immediately remove and cool with cold, running water.
3. Store in water in refrigerator until needed.
For dressing:
1/2 cup “Mitsukan” sushi seasoning vinegar
5 Tbsp white sugar
1/4 cup + 3 Tbsp white vinegar
3/4 cup + 2 Tbsp water
1. In small saucepan, mix all ingredients over medium heat until completely dissolved.
2. Remove to refrigerator to cool.
3. Dressing is best if allowed to rest in refrigerator overnight, but can be made the morning of.
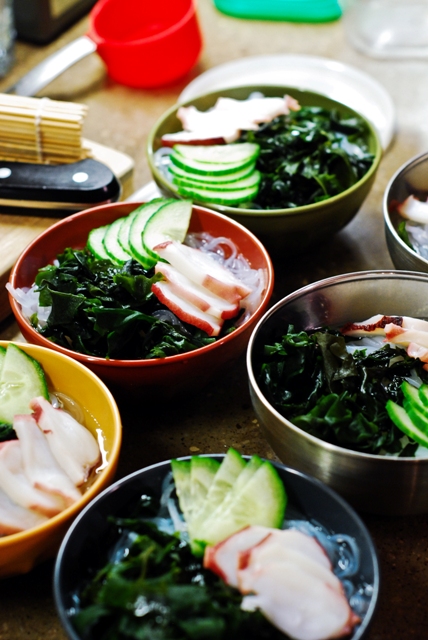
For accoutrements:
3-4″ chunk of Tako (octopus), Sliced thinly
3″ chunk of cucumber, sliced thinly in halves
1/3 cup rehydrated Wakame seaweed
To assemble:
1. Drain noodles by expressing the water out by hand.
2. Add to small bowls (filled about 1/2 to 3/4)
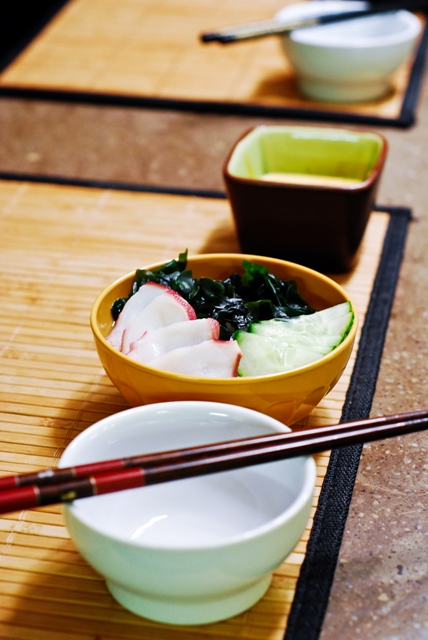
3. Top with slices of cucumber, wakame seaweed and octopus.
4. Fill bowls 3/4 of the way with dressing and serve.
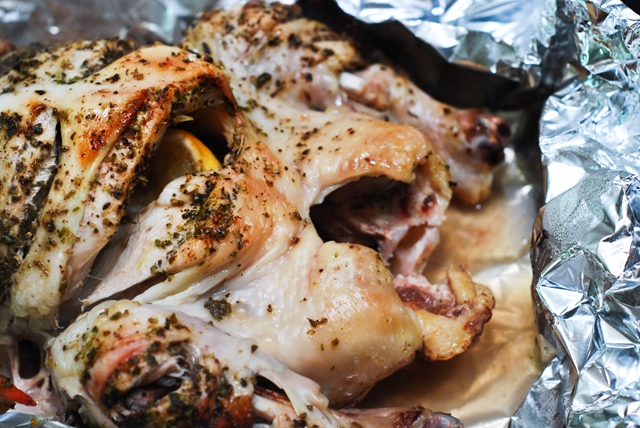
The perfect roast chicken. I’m sure you see that a lot, but what really makes a roast chicken “the perfect” variety? Crispy skin? Moist, succulent flesh? Flavourful, juices to make delicious gravies? I guess it’s really all relative. Some people will say crispy skin, which I agree is something of a delicacy, in which case I don’t eat it very often. I prefer to save my chicken skin eating for wings, oh so delicious and reserved for those special occasions. In my personal, humble opinion, the best roasted chickens are flavourful and moist in every bite. I hate to see dry white meat because the desire for crispy skin outweighed the desire for moistness of the flesh. Now I’m not saying you can’t have both, but I will say this. Chicken skin is bad for you! Bad, bad, bad…you shouldn’t be eating so much of it anyway.
Oh, who am I kidding, I love the skin. I’ll just say this then: I didn’t call this the “best” roasted chicken, because I find it slightly cliché. It is though, one of the best roasted chickens out there. Save for not much edible skin, being that it stays moist, this chicken is divine in every other part. Every piece is dripping in juices and tastes of amazing herbs and garlic.
I’m guessing this would translate well, even for turkey, although you need to up the cooking time. Trust me, you need to make this chicken. Little effort is rewarded in so much juicy, flavourful goodness. We saved the bones and skin for making stock the next day for chicken noodle soup. Just add all the bones, flesh and desired herbs into a large piece of cheese cloth. Tie at the top, and simmer in water or low sodium chicken broth for added flavour for a few hours. Then use it as the base for any kind of soups. Want not, waste not!
Oregano Roasted Chicken
1 large roasting chicken
1/2 lemon
2 cloves of garlic, halved
1-2 Tbsp dried oregano
1/2 Tbsp garlic powder
1/2 salt
1 tsp fresh ground pepper
enough olive oil to dampen herb rub
1. Slash chicken all over body, right down to the bone.
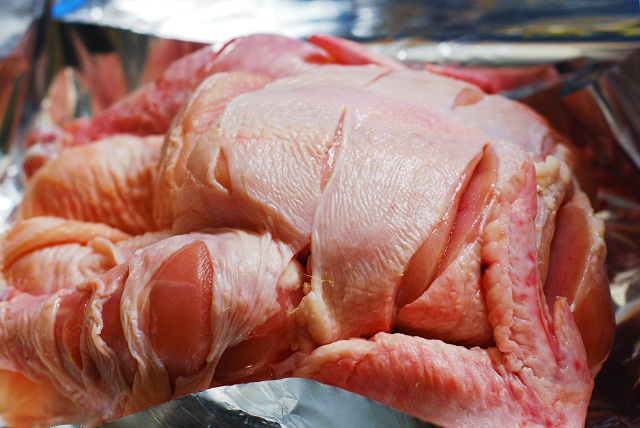
2. Place lemon and garlic cloves into cavity of chicken (add fresh herbs into cavity as well if desired).
3. Mix all other ingredients together in small bowl.
4. Rub all over chicken, making sure the mixture goes inside all the slashes.
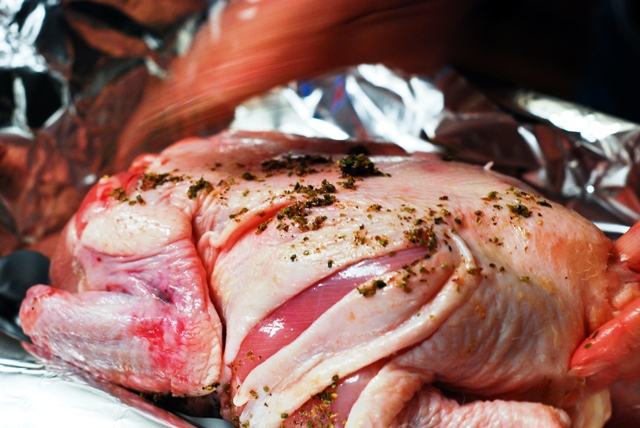
5. Take two long pieves of tin foil and line a baking pan. One sheet going across lengthwise and one piece crossing it widthwise, like an “x”.
6. Place chicken in foil lined baking pan and fold foil loosely around, making sure it is sealed but just loosely.
7. Bake in a 400°F oven for 1 1/2 to 2 hours (this may seem excessive, but it guarantees a devinely moist bird).
8. Carefully pour liquid from foil and set aside. (Alternately you could make a gravy with it at this point as well).
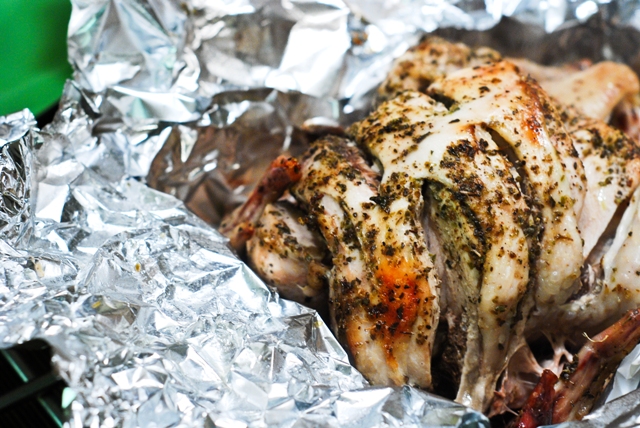
9. Remove chicken from oven and let stand for at least 10 minutes before carving, this will allow juices to reabsorb into the meat.
10. This chicken is delicious served with a rice pilaf, in which case the juices are poured directly over the rice and served.
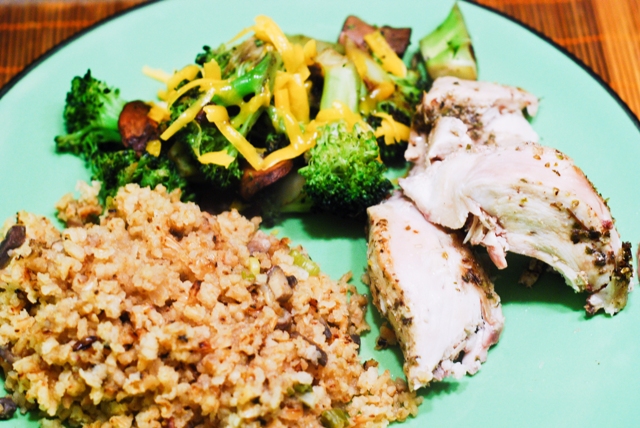

When birthdays make their appearance in my family, there is one thing that has always been a constant, ice cream cake. A family tradition spanning years, it has been there even for births. We were not well off growing up and were only allowed a “party” every two years. This worked out for us, as one of us would have a party one year, and the other the next. But even on our “off” years, we were allowed the indulgence of receiving a cake made just for us. Our name scrawled across the top in so many gelled letters, and our favourite characters stenciled in too.
But for years, my family has been buying the commercially make Dairy Queen Cakes, which are, well, commercially made. I thought to myself, I must be able to make this and it will a thousand times better. Indeed. What could be simpler than piling ice cream, fudge, cookie crumbs and more ice cream? The changes I made were simply to use better ingredients. Being that the name is “ice cream cake”, one would be correct to assume that the ice cream is the star of the show. So don’t cheap out, use good quality ice cream for this cake and you will surely, not be disappointed.
Chocolate Ice Cream Cake
2 litres chocolate ice cream
1/2 oz vodka
Smuckers Hot Fudge Sauce (334 mL)
1/2 pkg. Mr. Christie Chocolate cookies (100g)
1 cup whipping cream
1/2 tsp vanilla
1 tsp sugar
1. Allow ice cream to sit at room temperature for at least 30-40 minutes.
2. Divide into 2 9″ baking pans with bottom lined in parchment paper. Return to freezer to allow to refreeze.
3. In small bowl, mix fudge sauce with vodka (this is to prevent the fudge sauce from freezing solid). Set aside or refrigerate.
4. In another bowl or food processor, crush cookies into small crumbs.

5. When cake has sufficiently freezed, cut along sides of pan with a knife and flip onto a plate. Immediately move to freezer again for another 30 minutes.
6. When cake layer has frozen again, top with fudge, then cookie crumbs. When ready to serve, top with last layer of cake.
7. Serve with whipped cream. (To make whipped cream, beat whipping cream, vanilla and sugar until stiff and fluffy)

(Side note, here is an alternate method of making this cake: If you have a cheescake pan, this would be better, but I didn’t at the time. In a 9″ cheesecake pan, pour half the ice cream and return to freezer to freeze. When frozen, pour on fudge and cookies. Pour second half of ice cream over the cookies and allow to freeze for 24 hours. To serve, remove cheesecake pan and flip onto plate. Top with whipped cream as above.)
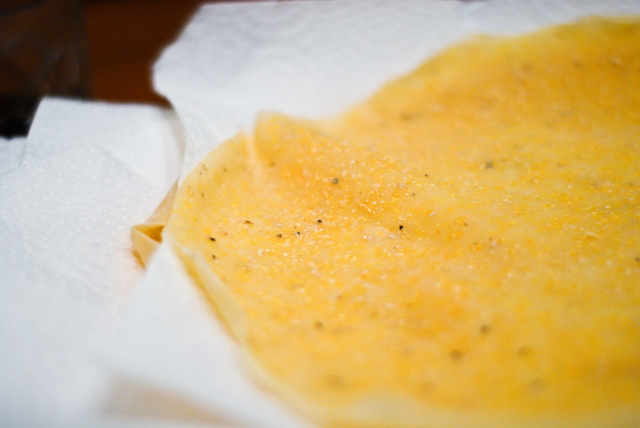
Well, here I am. I’ve come to the desert (and wine country) to be with my family. When new additions arrive, it is familial obligation to congregate. Not that I didn’t want to. Who doesn’t want to meet squishy faced new comers to our lovely planet? I love babies, in all their new baby smell, tiny arms and legs, squishy faced glory. What I don’t like is dragging my toddler son around on an airplane and leaving our routines behind us. He doesn’t seem to mind all that much, running around our temporary digs saying, “Mama, baby, baby, baby!” Also, I hate to be away from my own husband and the ease at which we live our daily lives. One of those eases, is my PC. I’m using an iMac here and I can’t say I see what all the fuss is about. I mean, it’s nice, but I really don’t see why people get so crazy about them. To each their own, but I’ll be loving my return to PC and tablet glory upon my return.
I only had one recipe in the archives available to me to publish while I make a repertoire here in the desert. It’s not a glorious meal, but it can be if you use your culinary imagination. Any fillings in these delicious wraps, goes down with ease. Have fun with them, let your kids build their own. They’ve been a staple in my family for at least 15 years, and I don’t see that changing any time soon.
Soft Corn Taco Shells
3 cups all purpose flour
1 1/2 cups fine ground cornmeal
1 tsp salt
2 eggs
4 cups water
1. In a medium size mixing bowl, whisk together all ingredients.
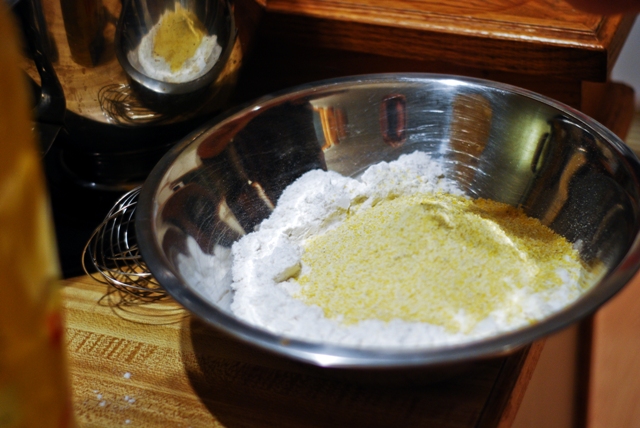
2. When ready, on a very hot, non stick skillet, pour in about 3/4 cup of the batter and spread it out in the pan by shaking it around so that it completely coats the bottom.
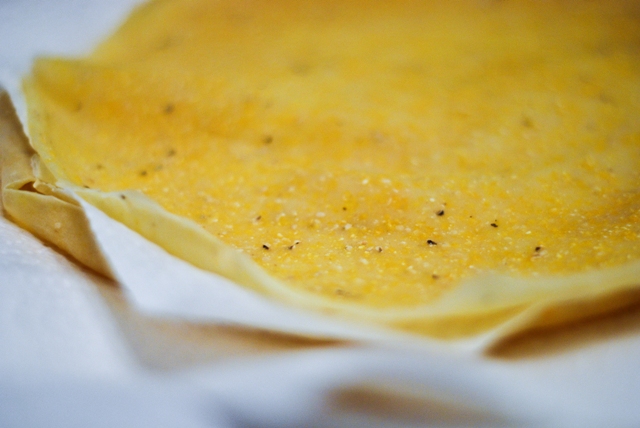
3. When the edges begin to turn up, shake the shell loose (you may need to use a spatula) and flip it with a flick of the wrist (or a flipper). Cook for 30 seconds or so on reverse side and toss into oven to keep warm. (layer paper towels between shells to avoid sticking).
4. Serve with desired fillings.
Taco filling suggestions:
- Ground beef seasoned with taco seasonings, diced tomatoes, shredded lettuce, shredded cheese, avocado slices, salsa and sour cream.
- Cooked, cooled shrimp with shredded lettuce, diced tomatoes, crumbled feta cheese, avocado, salsa and sour cream.
- Ground chicken or turkey with taco seasonings, same fillings as beef.
- Rotisserie chicken, pulled apart and served with same fillings as beef.
- ground pork, seasoned with taco seasonings and served with same as beef.
|

Hi! I'm Elizabeth. I like fitness, bad ass tattoos, food, bacon, chocolate, taking lots of silly pictures and my spawn. Check out my FAQ for all the usual Qs or send me an e-mail and tell me all about your cat and your Aunt Sally's amazing apple pie. |


