There’s nothing quite like having friends over for a BBQ. Because, stuff like this happens:

It’s just plain, old fashioned good times. Girls really do just want to have fun. A little wine doesn’t hurt either.
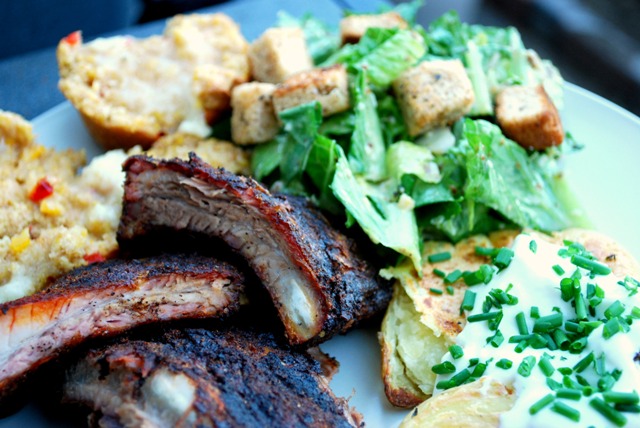
Well, last night was a great throwback to some Southern style BBQin’. We had a little meat, some Caesar salad, Cornbread muffins and Ree Drummond’s (of The Pioneer Woman) delicious “Crash Hot Potatoes“. I’ve just heard so much goodness about them, that I had to try them. Had to.
Now, since the Crash Hot Potatoes recipe can be found anywhere, go ahead and get that recipe from the link above. It’s perfect the way it is.
Also, the recipe for the Cornbread muffins was taken from the package, with a little bit of peppers thrown in and milk changed to buttermilk. I used Bob’s Red Mill Organic Whole Grain Cornmeal.
The other two recipes are original, so you should definitely try them out. They are delicious, believe me.
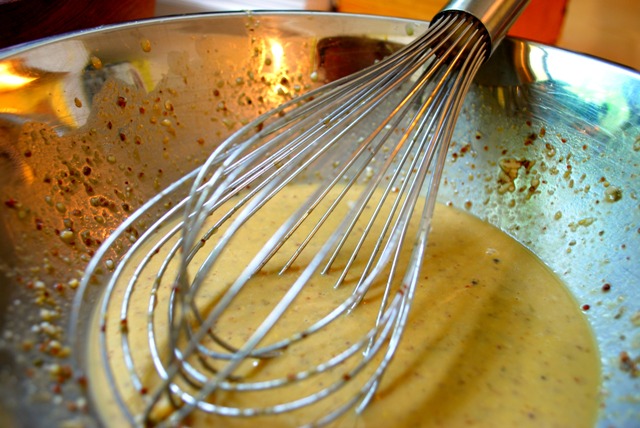
Mom’s Creamy Caesar Salad Vinaigrette
Yield: Enough dressing to dress one whole head of Romaine, about 3/4 -1 cup
2 egg yolks, coddled
2 Tbsp. Grainy Dijon mustard
1 Tbsp. minced garlic (about 2 cloves)
1 Tbsp. Anchovy paste or finely minced anchovy fillets
1 tsp. Worcestershire sauce
6 Tbsp Extra virgin olive oil
3 Tbsp Red wine vinegar
juice of 1/2 a lemon
2 Tbsp. capers, crushed
3 Tbsp. grated Parmesan

1. To coddle your egg yolks, boil some water (enough to cover both eggs in a bowl). Pour boiling water over eggs and let stand 1-2 minutes. This will thicken and warm the yolks. (note: You may want to warm the eggs first in a little warm water, or take them out of the fridge in advance to warm them up. You don’t want them to crack when you add the boiling water.)
2. Whisk yolks in large bowl. Add Dijon, garlic, anchovy paste and Worcestershire sauce and whisk again.
3. Whisking as you go, slowly add oil to Dijon mix. You may not need to add the whole amount, but taste as you go. This dressing can be fairly strong, so it depends on how you like it.
4. Whisk in vinegar, lemon and capers. At this point, if dressing is not thick enough for you, keep whisking! Whisk like nobody’s business!!
5. Add Parmesan and refrigerate until needed.
Croutons
3 slices bread ( I used multigrain bread, because it’s what I had, but you can use anything really)
Extra virgin olive oil to drizzle
herbs of your choice (I used basil, oregano, rosemary and thyme)
Salt and pepper to taste
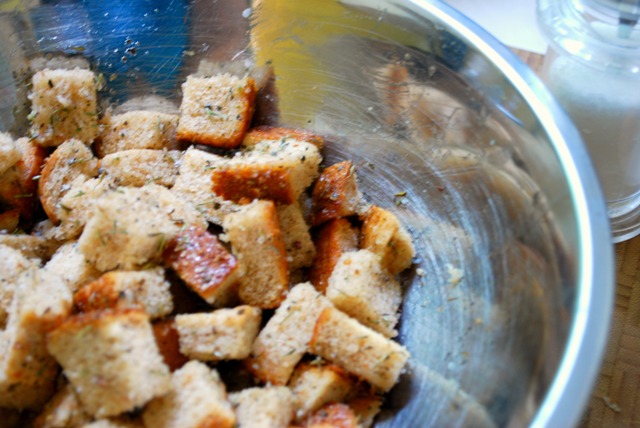
1. Cube bread and place in mixing bowl.
2. Drizzle with enough oil to wet a bit and add herbs and salt and pepper. Toss to coat.
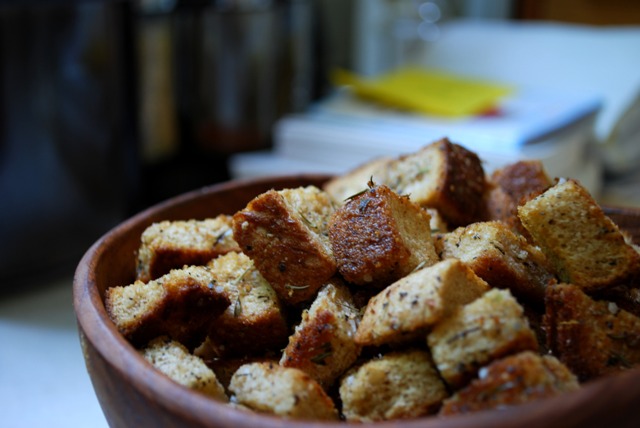
3. Spread evenly over baking sheet and bake for 7 minutes at 350F.
4. Turn and bake another 3 or 4 minutes.
5. Remove and cool.
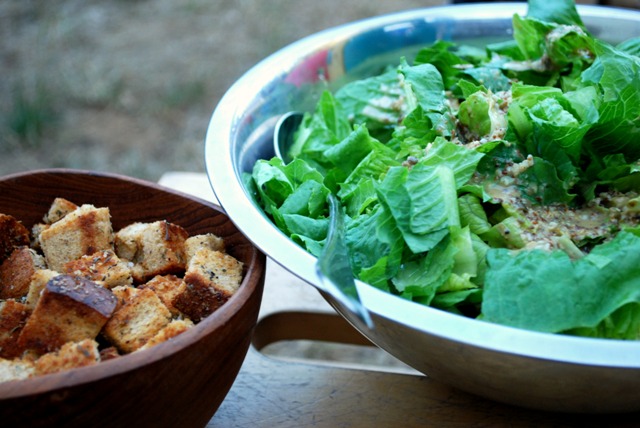
Now assemble your salad. Pour dressing, toss, add croutons and more Parmesan and toss again!
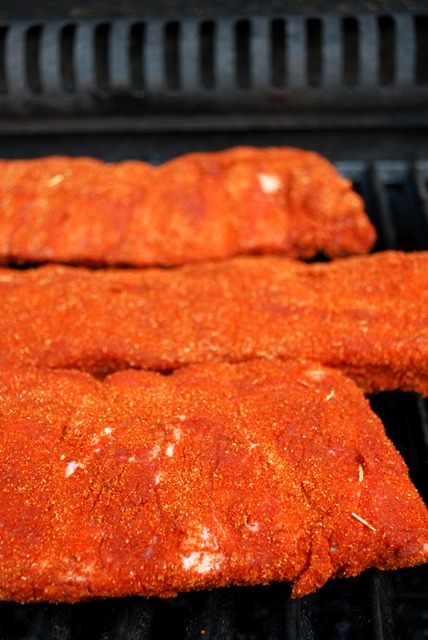
And now for the main attraction! Meat! I know, I know, didn’t I just say yesterday that meat isn’t big in our house? Well, I din’t say we didn’t eat it! My husband would wither away without meat once in a while. We cut out most meat for cost reasons and then we just stuck with it for the health benefits. But, when a friend brings three racks of baby back ribs over to my house, I ain’t complainin’!
BBQ Baby Back Ribs with Dry Spice Rub
6 Tbsp. Smoked paprika
1 Tbsp. Chili powder
1 Tbsp. Seasoning salt
1 Tbsp. Poultry seasoning
1 Tbsp. Garlic Powder
1 Tbsp. Onion Powder
1 Tbsp. Dry Mustard
1 Tsp. White pepper, ground
1 tsp. cumin
1 tsp. Cayenne pepper
1. Blend all together in bowl. Set aside.
2. If using baby back ribs, remove silver skin from back before beginning.
3. Rub spice mix all over ribs.
4. Preheat BBQ on high. When hot enough, turn one side down to low and turn other side completely off. Cook on side that is off for 1 1/2 hours. Flipping every so often.
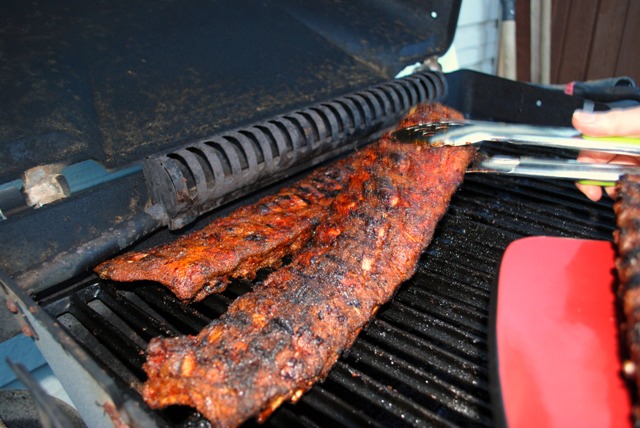
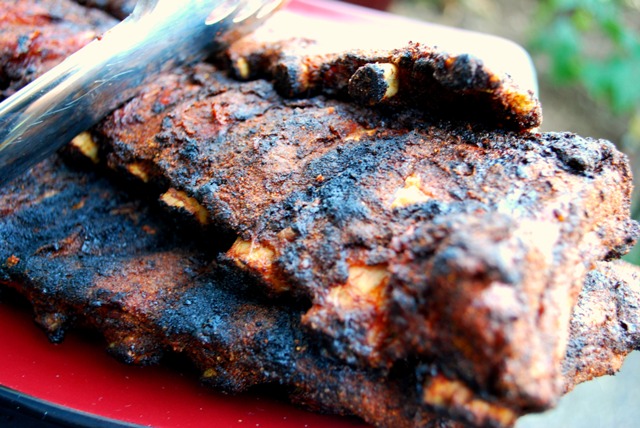
5. When done, let sit for 5 minutes or so to let the juices permeate your meat. When they’re ready, serve ’em up to your starving guests who’ve been smelling divine things for the past 2 hours.
For a long time I bought my almond milk in the store in a Tetra Pak. Then I thought, “Wait a sec, this has, like, one ingredient, maybe two. I must be able to make this myself.” and off I went to Google it and find a recipe. Well, there are a lot of ways of making almond milk. Soaking, no soaking, deskinning, leaving the skins on. I guess it’s personal preference. I prefer a fast approach. This turns into a beautifully frothy, delicious beverage. I use it in my cereal and in my sons smoothies.
At the end of the process you will be left with a lot of almond meal. Don’t worry, I will give you some ideas as to what to do with it.
Almond Milk
1 cup raw, skin on almonds (do not use roasted, it will go rancid)
4 cups cold, fresh water
Flavouring: Here’s where it gets personal. I use a little bit of vanilla and no sweetener. I’m sure a lot of you don’t like it that way, so add whatever you like to taste.
1. Place almonds in blender

2. Add water and flavourings, blend on high for about 3-4 minutes. (You might want to start by pulsing it a bit, just so your blender doesn’t blow water and almonds everywhere. That’s coming from experience)
3. When it’s all blended and frothy looking, you will now need to sieve out the almond meal. You could use cheesecloth for the whole process, but I found it a bit messy. I used a fine mesh sieve first, sieveing the liquid into the container. I then take the remainder of the almond meal and put that in a piece of cheesecloth and squeeze out the rest of the liquid. This will ensure a very dry crumb.
4. Refrigerate your almond milk and let’s deal with the meal, shall we?
5. Spread your almond meal on a cookie sheet and place in your oven with just the light bulb turned on. This will ensure that the almonds aren’t roasted, they just dry out. You could turn it on at a very low temperature, but I would stick with the light bulb method.

6. It takes about 6-8 hours to dry, so I usually do it over night. When it is dry enough, I run it through the blender again or pound it using a mortar and pestle to achieve a powdery consistency.
7. You now have almond meal or almond flour. You can try my almond cookies or thy this site.

In summer I can’t think about anything but fresh vegetables and the myriad recipes attached to them. I love vegetables. I may have been a picky toddler (not unlike my own fruititarian son), but at some point in my life, vegetables became an obsession. So much you can do with them! So much in season! So many colours and textures to play with. How anyone could not like them, is beyond me.
Sometimes, vegetables are all I have in the kitchen to cook with. We’re not big on meat in this family and our garden has been producing fairly well this year (although not enough to discontinue the weekly grocery shop). So I found myself with little to cook with, but enough to make a lush, vibrant soup. I also had a little container of firm tofu as well, and of course a pantry and refrigerator full of condiments. There’s nothing like hot soup on a hot summer night, right?
Fresh Pea Soup with Miso Marinated Tofu
For the soup (adapted from Eat Smart):
1 tsp. Olive Oil
1/2 medium onion, chopped
2 1/2 cups chicken broth
1/2 tsp. salt
Fresh ground black pepper
12 oz. Peas (fresh or frozen)
Seasoning of choice (I used some left over pesto, but basil, tarragon, thyme, oregano or whatever you like would work just fine)
1. In a large soup pot, heat oil over medium-low. Add onion, and cook until softened, about 5 minutes. Add broth, seasoning, salt and a few turns of black pepper.
2. Bring to a boil over high heat, add peas and cook until just heated through.
3. Puree the soup until very smooth using an immersion blender or a regular blender.
4. If serving hot, return soup to pot and bring to a simmer, add tofu and serve with a sprinkle of grated Parmesan or a tsp. of sour cream or plain yogurt. If serving cold, transfer to refrigerator and chill.
For the Tofu:
Half a package of firm tofu
1 1/2 Tbsp. White Miso (Amano)
1 1/2 Tbsp. Japanese mayonnaise
1 Tbsp. Mirin or rice wine vinegar
1. Mix all ingredients (except Tofu) in bowl.
2. Cube tofu to desired sizes (I prefer large chunks, about 3/4″ x 3/4″)
3. In hot pan, add tofu and sauce.
4. Cook on medium high until browned around edges.

Similarly delicious recipes on other blogs:
Spicy Collards and Black-eyed Pea Soup on Fat Free Vegan Kitchen
Edamame and Pea Soup with Herbed Lemon Cream on Pinch My Salt
Tuna Tofu Miso Mini Burgers on Just Bento
Creamy Pea Soup on Greedy Gourmet
Spinach and Tofu Salad with Japanese Sesame Miso Dressing on Rasa Malaysia
Ahhhh……Saturday. My favourite day of the week. Every week on this day, my husband, my son, me and anyone else who wants to joins us, heads out for some well deserved relaxing adventure. Well, they aren’t always relaxing. Sometimes we hit the trails for a monumental hike, as it’s good to earn those calories at the end of the day.
Well, with yesterday’s disastrous baking results, and my all nighter learning CSS and HTML and all sorts of other technical jibber-jabber, we thought something more slow paced was in order. A call was placed to the in-laws, vehicles and toddler snacks were readied, and it was off on a mini local wine tour and bistro lunch at Merridale Cidery.
We sampled some very nice Pinot Gris, Ortega (a German cold weather grape, which grows well here), Gewurztraminer, and others.
We did mostly sample whites, as my husband is prone to migraines. We then travelled to the tiny village of Cowichan Bay, where we visited Hilary’s Cheese and True Grain Bread. Both are locally owned and locally operated. Hilary’s is a bounty of delicious cheeses, both locally produced and imported.


True grain bread produces all it’s own breads and also sells it’s own stone ground flours. Some of which are sourced from wheat grown right here on Vancouver Island.


Then we hit the cidery to sample some delicious Ciders, Fortified wines and Spirits. Ahhhhh….relaxing.
Alright, alright, on to the ice cream! I know it’s what you were all really dying to hear about. Well, you can put away those sneers and laughs, because it turned out beautiful! It was like I meant to make ice cream or something. I do have to give props to Very Small Anna, though. Without her tip of using vodka in the coulis, it would have turned out rock hard, but it turned out as if I had used an ice cream maker. Which I obviously did not. I, of the tiny kitchen and 15 year old food processor, prefer the good old fashioned loaf pan method. Booyah!
Here’s the recipe:
Chewy Tarts with Orange Vanilla Blueberry Swirl Ice Cream
For the Rough Puff Pastry (adapted from Fine Cooking):
6 oz cold flour
1/2 tsp. salt
6 oz. cold unsalted butter, cubed
3 oz. very cold water
4 Tbsp. casters sugar
1 tsp. nutmeg
1 tsp. cinnamon
1. Sift dry ingedients onto the cold cubes of butter. Pulse until crumbly.
2.Add ice water a tbsp. at a time to loosely bind dough. Mix until dough just barely hangs together.
3. Shape the messy, shaggy dough into a rough rectangle and roll it out until it is 1/2″ thick. Do not overwork!
4. Fold dough into thirds like a letter. Turn 90 degrees so fold runs vertical. Roll into rectangle 1/2″ thick, rolling from open end to open end. Square off edges as you work.
5. Keep rolling, folding, turning. About 4-5 times.
6. Chill 1/2 hour. Remove from fridge, give 2 final turns and rest again.
7. Roll out dough. Sprinkle with sugar and spices.
8. Fold in half lengthwise and roll out again.
9. Cut into 10 thin round slices. Press into greased muffin tin, making sure to prick bases. Alternately, you could use baking paper and pie weights for this step as well.
10. Bake for 15 minutes at 350F. Cool and set aside.
For the Ice Cream:
Custard Ice Cream
3 large eggs
3 Tbsp. honey
2 vanilla pods or 2 tsp vanilla extract
zest of 1 orange
300mL whipping cream
Now keep in mind this was a recipe for custard, which didn’t set. When I took it out of the fridge it was still liquid. I immediately put it into a loaf pan and set it in the freezer. It came out just like regular ice cream. I suspect most ice creams call only for yolks and no whites, but I used the whole egg.
1. Whisk eggs and honey in large bowl.
2. Place cream in heavy bottomed sauce pan. Add vanilla and orange zest.
3. Heat cream to boiling point.
4. Whisking as you go, gradually add cream to egg and mix well.
5. Pour cream and egg mix back into saucepan and cook over low heat, stirring constantly. 5 minutes. Do not boil or it will curdle.
6. Strain into bowl add 2 tbsp. vodka and place in freezer.
7. While ice cream sets a little, make blueberry coulis.

Blueberry Coulis
3 cups Fresh blueberries, washed
Juice of 1/2 an orange (you could use the whole thing)
2 Tbsp. Agave nectar
2 Tbsp. Vodka
1. Place everything but vodka in saucepan.
2. Bring to boil and simmer until sauce thickens and reduces by about 1/2.
3. You can strain it through a sieve at this point if you wish.
4. Optional: Put back into saucepan and bring to simmer. Add slurry of equal parts cornstarch and water to mix and bring to boil, simmering until desired thickness is achieved.
5. Remove from heat and cool. Add vodka and stir.
6. When the blueberry coulis is cooled, add to the cream base that is in the freezer. Swirl together, but don’t mix too much.
For an extra kick, I made a little caramel sauce to pour over the assembled tarts.
Caramel Sauce
3 Tbsp. Sugar
2 Tbsp. Water
1/4 cup heavy cream
1. Dissolve sugar and water over low heat, swirling to mix.
2. Increase heat to boil until caramelized. You should see a nice mahogany colour. Be careful not to burn it.
3. Slowly add cream and simmer until thickened.
4. Cool and refrigerate.

Just a little side note:
The site is coming together beautifully, but there are bound to be bumps along the way. I expect the site to change appearances a few times in the coming weeks or months, but please stick with me! I promise you won’t be dissapointed!
|

Hi! I'm Elizabeth. I like fitness, bad ass tattoos, food, bacon, chocolate, taking lots of silly pictures and my spawn. Check out my FAQ for all the usual Qs or send me an e-mail and tell me all about your cat and your Aunt Sally's amazing apple pie. |


