Hello all and welcome to a new an improved Guilty Kitchen! You might have noticed a few changes around here. If not, please take a second to look around and check out the changes I’ve made. They are all in the name of making this here blog a user friendly place to come for mouthwatering food and droolworthy photos. I’ve created a Recipe page (Located in the top left corner, under the “Pages” header), which should make it easier for you to find what you’re looking for.
I’ve added a Print function to the bottom of all the posts so that you can print the recipes without all the other junk (IE pictures). This should make it very convenient for those who don’t care to read my blathering on and would just like to make food. There is also a small feature in the Comments section for adding a link back to your own blog (Comment Luv) if you have one.
Please bear with me as I try to get back into the swing of things after our big move. It’s been a busy week! I have loads of good stuff waiting in the wings though, so stick around!
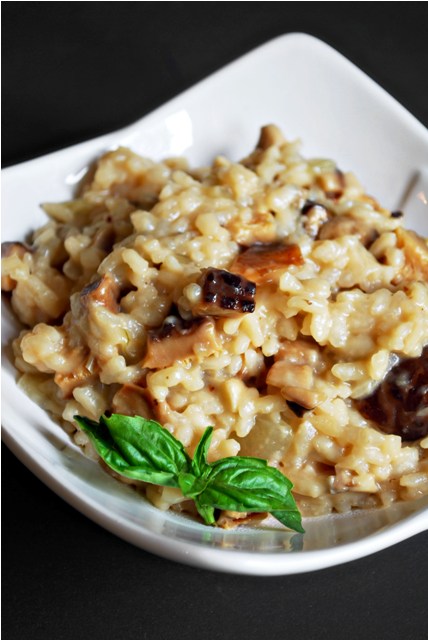
Today’s recipe is for Mushroom Risotto. There’s just something about Fall that makes me want to tuck into a nice, creamy, thick risotto. Especially when it’s been pouring rain for the past week. This makes a large batch, enough for a family of four or a couple, with leftovers. (Save some and you can make stuffed Risotto Balls, recipe follows).
Mushroom Risotto
2 cups Arborio Rice
1/2 a large, sweet onion
2 oz Dried Mushrooms (I used shiitake)
150g Crimini mushrooms, roughly chopped
1 Tbsp Canola oil
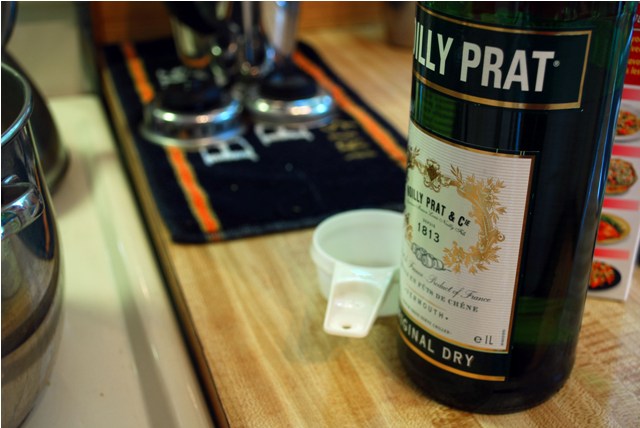
1/2 cup white wine or vermouth
2-3 cups stock (in addition to mushroom soaking water)
Parmesan cheese (I used about 100 g)
salt & pepper
1. In a medium sized bowl, place dried mushrooms and 2 cup of boiling water. Soak at least 30 minutes prior to beginning recipe. Reserve water for use as stock.
2. When dried mushrooms are finished soaking, roughly chop them and set aside.
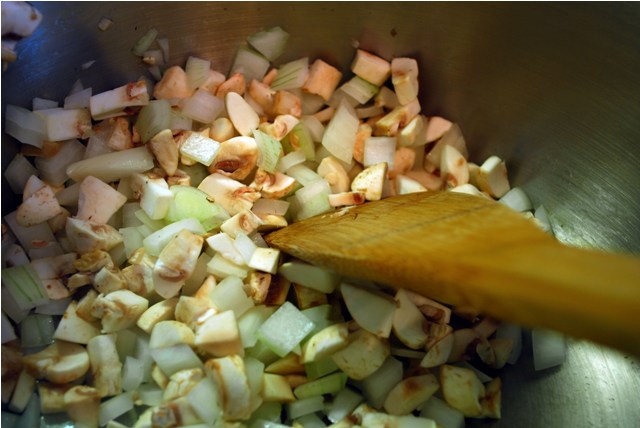
3. In large, deep saucepan, add oil, onion and mushrooms. Sauté on medium heat for about 5 minutes, enough time to allow the onions to become translucent.
4. Add rice and sauté for about 3 minutes. Add in wine or vermouth and stir until absorbed.
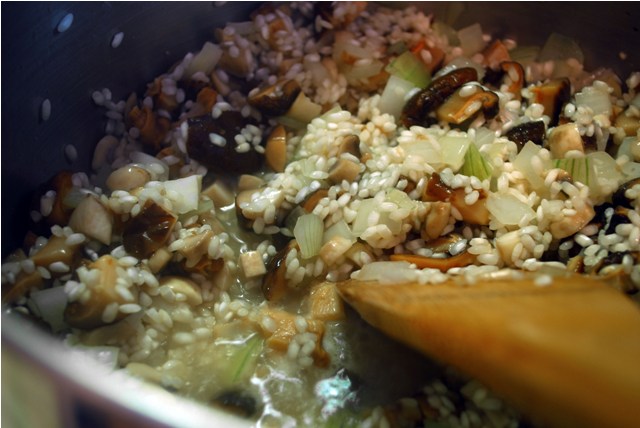
5. 1 cup at a time, add the mushroom water and stock. You don’t have to stir constantly, but you should probably stick around the kitchen and keep stirring fairly often. When all the liquid has been added and absorbed, season with salt and pepper and add the cheese. Stir and allow to sit for a couple minutes before serving.
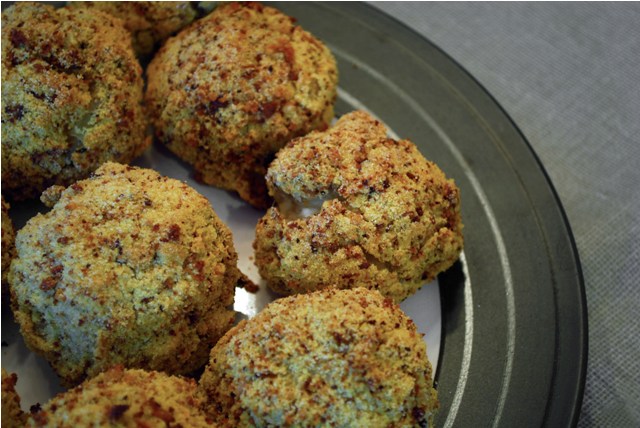
What to do with the leftovers, besides just eating?
Baked Stuffed Risotto Balls
You will need:
cold risotto
soft cheese (I used fresh goat’s cheese)
bread crumbs
corn meal
salt and pepper
2 eggs
small amount of milk
baking spray
1. Shape the risotto into half rounds with a small depression in the centre. Place a small piece of cheese there (about the size of a quarter) and then add more risotto onto the top and shape into a ball. Continue to do this until all your risotto is used up.
2. Roll the balls in a mixture of bread crumbs, corn meal and salt and pepper. Then dip in an egg wash (eggs and milk), then dip back into the bread crumbs. Now place them on a greased baking tray. Continue until all your risotto balls have been breaded.
3. Spray all the risotto balls with the baking spray and bake in a 375°F oven for about 30 minutes.
4. Serve as a side dish, or if you’re really hungry, a snack!
I’m a bit of a sucker when it comes to a request for a baked good. I’ll admit it. I’m a bit of a sucker when it comes to baked goods. Period.
Any given moment, I am one step away from making every butter laden recipe I can get my greasy little hands on. The only thing stopping me is my guilt. If I make it, that means I have to eat it. Since we now live 30 minutes away from all our friends and family, that means I will eat the whole thing before anyone has a chance to see it. That way, it was like it was never there, right? Humour me, people.
Well, last night, Mr. Guilty decided he had a hankering for blueberry muffins. I have to say, they’re not my favourite. They are usually doughy, white and plain. At least they are when bought from any number of local bakeries around here. I have tried my hand at them before, but usually, my muffins come out as little hockey pucks. Most likely, it’s because I’m always trying to replace the white flour with whole wheat. I know it makes the muffin more dense and chewy, but again, the guilt! If I’m going to eat a whole tray of muffins, at least they were whole wheat. Whole wheat = healthy, right?
Well, this time, I thought “what the hell?” I’ve been unpacking boxes for a week! I must have burned a few calories, at least enough to not feel guilty if I down the whole tray. Which I might, if Mr. Guilty doesn’t beat me to it.
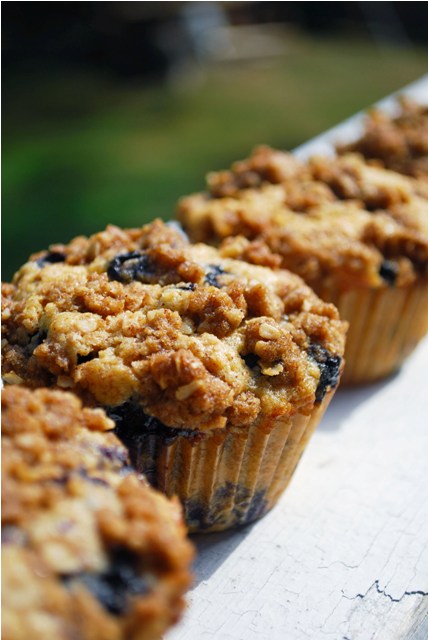
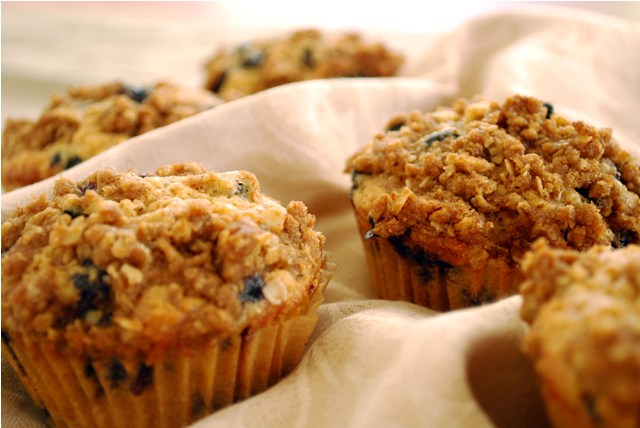
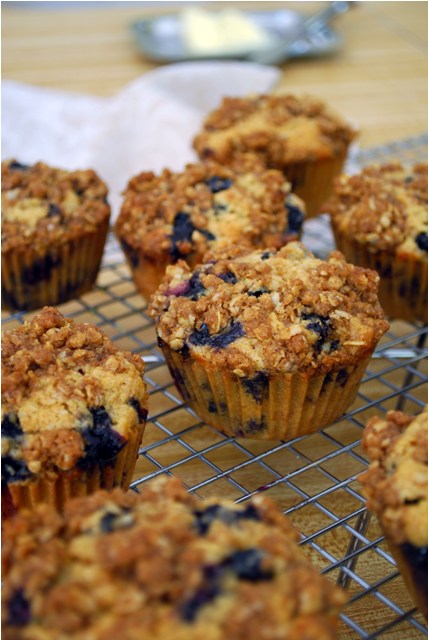
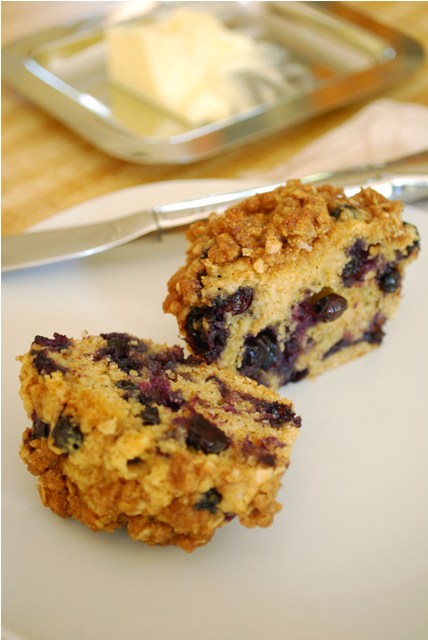
These muffins are light, sweet, buttery and packed to the hilt with juicy blueberries. They are reminiscent of tiny, personal sized coffee cakes. I warn you, if you make these, don’t plan on having too many to share. But if you think you might, these would be perfect weekend fare. Served up with a slather of (more!) butter, or sweet preserves, these could be the perfect Saturday morning snack.
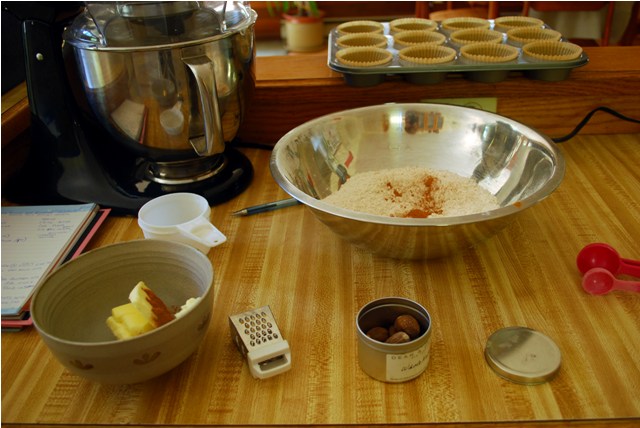
Browned Butter Whole Wheat Blueberry Muffins
Adapted from The Gourmet Cookbook
Yield: 12 muffins
Prep Time: 30 minutes
Cooking Time:25 minutes
3 1/2 oz. unsalted butter
1/3 cup whole milk
2 eggs
1 tsp. vanilla extract
3 oz All purpose flour
4 oz. Whole wheat flour
3/4 cup sugar
1 1/2 tsp baking powder
1/2 tsp. cinnamon
3/4 tsp. salt
2 cups fresh blueberries (Pop these in the freezer about 10 minutes before you begin so they won’t stain the batter when folding in)
For the topping:
1 1/2 Tbsp unsalted butter
1/4 cup all purpose flour
4 Tbsp Brown sugar, packed
2 Tbsp quick cooking oats
1/2 tsp. cinnamon
1/4 tsp. nutmeg (preferably, freshly grated)
1. Put rack in upper third of oven and crank it up to 375°F. Line a 12 muffin tin with paper cups or grease them.
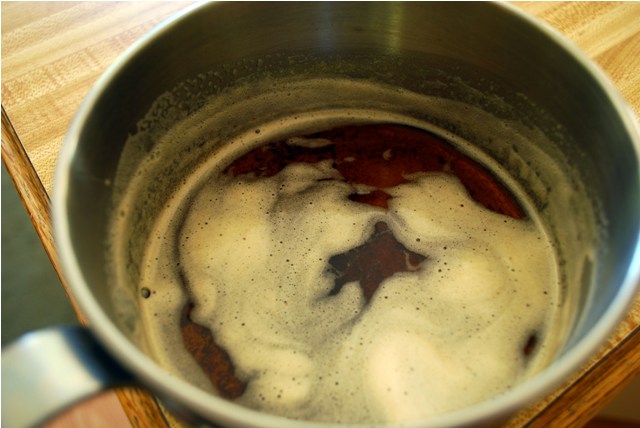
2. In a small saucepan over medium high, melt the butter. Cook it down until the colour begins to change. Watch carefully and remove when it darkens but is not burnt. It should look like this:
3. Whisk the milk, eggs and vanilla in a small bowl. Add the butter to the milk and whisk to combine.
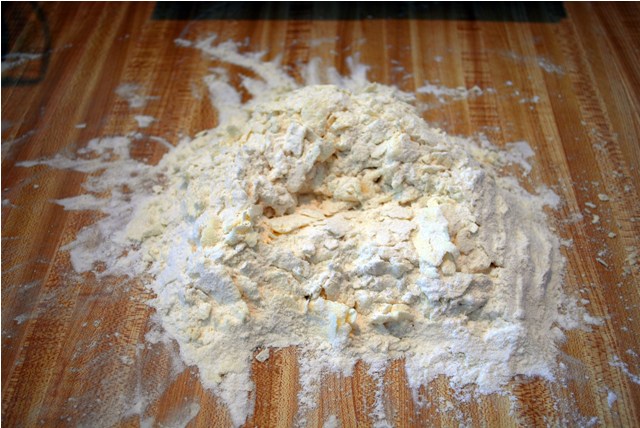
4. In a large bowl, stir the flours, sugar, baking powder, salt and cinnamon. Add the butter and egg mixture all at once and gently stir to combine.
5. Fold in your slightly frozen blueberries. Don’t over mix it though!
6. Divide equally among your muffin cups.
7. To make your topping, rub all your ingredients together with your fingers until crumbly. Sprinkle over the tins and bake in a preheated oven for 20-25 minutes.
8. Cool in muffin tin 10-15 minutes before removing to cooling rack. But I doubt you’ll make it that long. These babies are soooo good when they are still warm.
What’s your favourite weekend morning temptation? I’m partial to something warm, baked and slathered in butter. Eggs and toast will do in a pinch, as long as they too, are slathered in butter. Notice a theme here? Butter? You’ll find it in 99% of my recipes. Somewhere….

Nothing brings back memories of childhood quite like a warm apple pie……………..oh wait, your mom was like mine and didn’t bake anything unless it was Christmas, and even then dessert was a no bake Better Than Sex Cake? Oh. Yeah…well okay, that’s a recipe for another time.
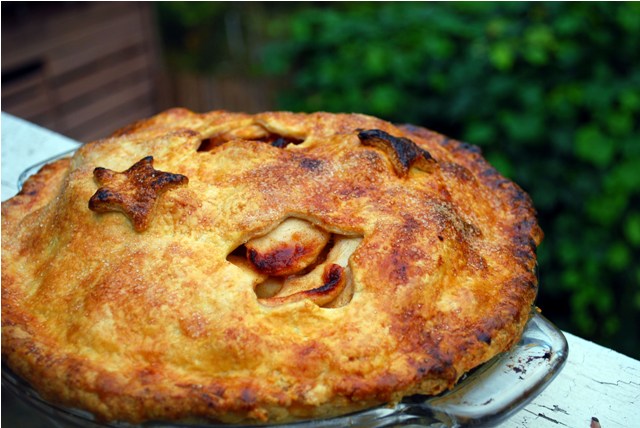
Nothing brings back memories of the return of autumn quite like a warm apple pie. Okay, is that better?
There’s just something about apples and cinnamon that evokes memories of crisp fall weather. Scarves, the crunch of fallen leaves under foot, the lingering scent of woodsmoke in the air, the unmistakable glee on parent’s faces as their kids return to school full time. Ha ha haahahahahahah!!! Oh sorry, back to the memories…
Where was I? Oh yeah, darker evenings, the return of hearty meals and stews…you know what I mean.
There was a time in my life when I was always on the search for a good pie recipe. How many times did I rely on premade dough? Too shameless to count. Thinking back to my culinary training, I remember the “perfect” pie dough was made with all lard. To me though, the perfect pie dough is all butter, I just can’t stand that gritty taste of rendered pork fat in my sweet pastry.
And so the years have gone by and I’ve made many a pie dough. None so great as this though. I have to give credit to Joy the Baker for the recipe though. I did do my tweaks (as I always do), but the hard work was hers. Thanks Joy!
In any case, a good apple pie can be hard to find, but I guarantee you this one is a keeper.
Mile High Apple Pie
Adapted from/Inspired by Joy the Baker‘s Apple Pie, With Love
All Butter Yogurt Pie Dough
8 oz. Cold unsalted butter
12 oz. All Purpose flour
1 Tbsp sugar
1 tsp salt
1/4 cup plain or vanilla yogurt
1/4 cup whole milk
1. Cut the butter into little pieces (about 2 cm by 3 cm). Throw them in the freezer for about 15 minutes. While they’re chillin’ out, measure your yogurt and milk, mix together and throw that in the fridge.
2. Sift your flour, sugar and salt in a large bowl. Now take your butter out of the freezer and toss it in the flour. Just swirl it around a bit in the bowl.
3. Dump this out onto a work space and roll with a (preferably) cold, marble rolling pin (regular old wood will work just fine too).
4. Once you’ve got yourself some little flat pieces of butter swimming amongst a sea of flour, throw that back into a bowl and put it in the freezer for 5 minutes,
5. When it’s all nice and chilly, pull it out, make a well in the centre and pour the yogurt/milk mix right in. All of it.
6. Bring the dough together using your fingers. If you need to, add a teeny tiny amount of milk…but you shouldn’t need to.
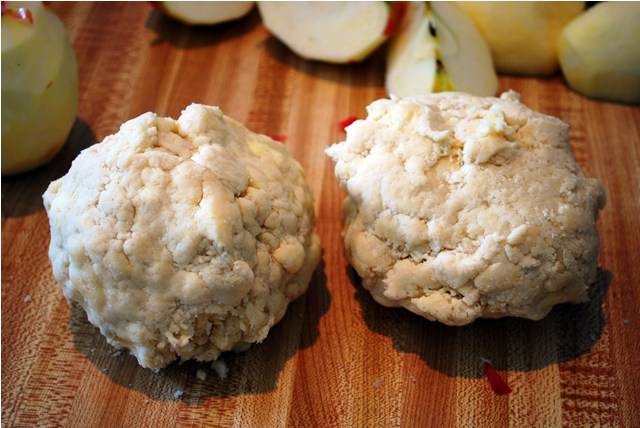
7. When done, you will have a shaggy mess of doughy goodness. Roughly shape into two flat rounds, wrap in plastic and refrigerate for 1 hour.
Meanwhile, make your filling!
Mile High Apple Pie filling
4 1/2 lbs. of apples (I used Sunrise)
Juice of 1/2 a lemon
1/2 cup yellow or brown sugar, packed
1/4 cup granulated sugar
2 1/2 tsp – 1 Tbsp cinnamon
1/2 tsp nutmeg, freshly grated if you have access (this makes a big difference)
1/4 tsp salt
2 Tbsp. butter
2 Tbsp. + 1 tsp Cornstarch
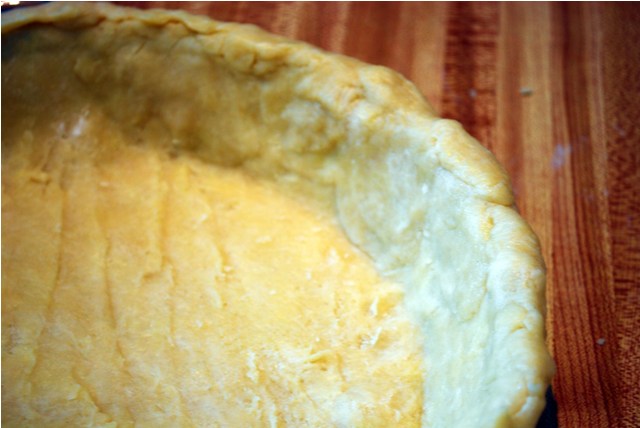
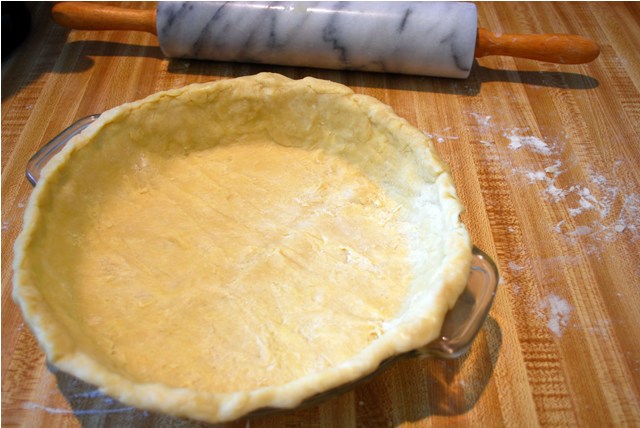
1. Remove one of your lovely pie dough disc balls from the refrigerator. On a floured surface, roll it out to within an inch of it’s life (or rather, within 1/8″ of the surface your rolling it on). Sit the rolled dough in your desired pie plate. Trim edges (and if you’re like me and like a nice thick crusty edge), fold a little dough over itself and double up the edge of your crust. This dough is very forgiving, mold it and shape it as you will. Now put it back in the fridge for about 30 minutes or up to 3 hours if you have better things to do.
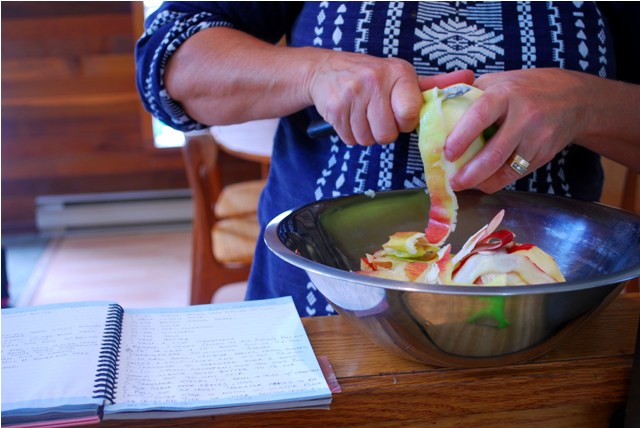
2. Get yourself a slave, I mean, your Mother maybe, to peel, core and slice your apples (I like a nice 1/4″ slice, but a little thicker works too).
3. In a large bowl, combine your apples, lemon juice, sugars, spices and salt. Cover the bowl with a dish towel and let it mellow for about 30 minutes.
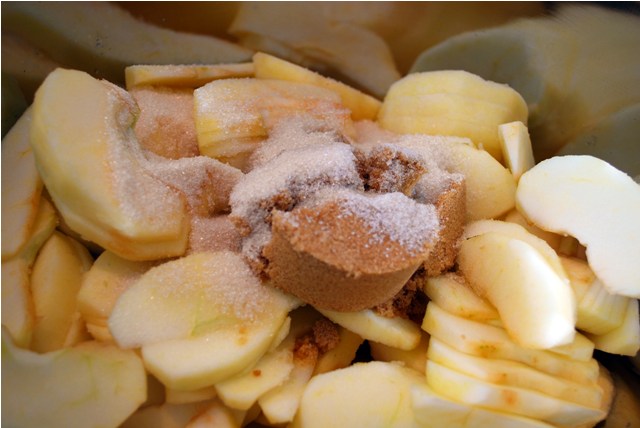
4. When it’s nice and mellow, place a collander over another bowl and pour your apples into it. Drain them suckers for all their sugary juices. Allow to drain for a good 5 minutes to achieve maximum juice flow.

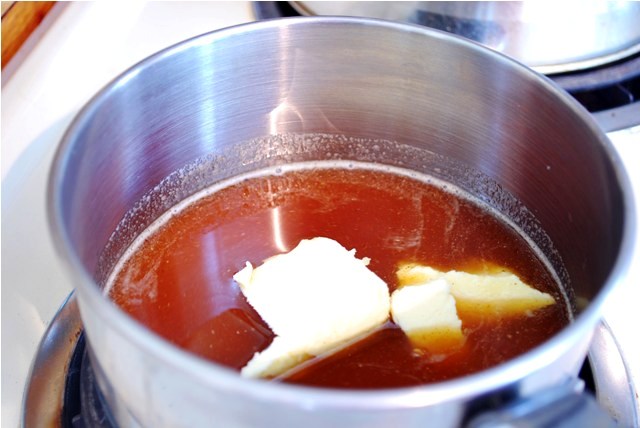
5. In a small saucepan over a medium high flame (if you’re on one of them fancy gas stoves, in which case I hate you…erm, I mean I’m soooooooooooooo jealous!), or just plain ol’ medium high (that’s a 7 or 8 on your dial), boil down those lovely juices (and those cute “knobs” of butter) until they are thick and golden or until they’ve reduced by about a 1/3 to a 1/2. Don’t stir though! Simply swirl your saucepan every few minutes.
6. Transfer those apple slices from the colander back to the big bowl you were using before, and toss with the cornstarch. Don’t worry about clumps, they’ll melt later.
7. Pour your buttery syrup over the apples and toss to distribute.
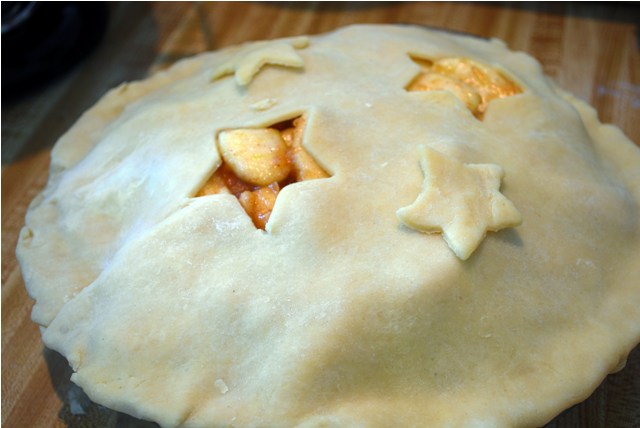
8. Roll out the second crust for the top of your pie. Same as before, except this time, be sure to cut out some cute little stars or holes of some kind so it can breathe. Slits are fine too. Dump your apple goodies into the base pie crust, moisten the edges with a little water and pop the top crust on top. Trim the edges and then tuck those under the bottom crust. Now you’ve got a really thick edge crust (This also prevents burning of the edges). Throw that sucker back in the fridge for another hour.
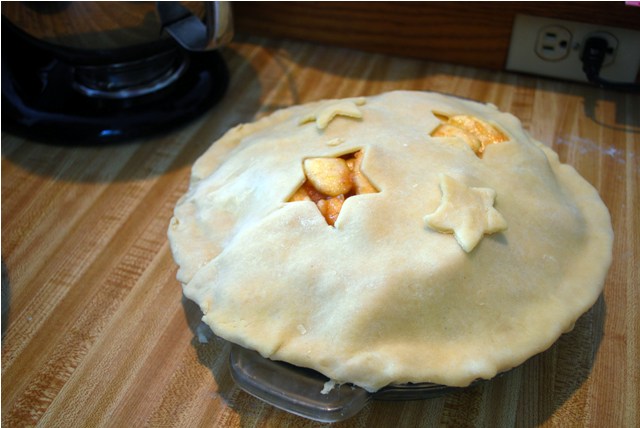
9. Preheat your oven to 425°F. Brush the top of your pie with a beaten egg and sprinkle that with sugar. Set your pie on a foil lined baking stone or a baking sheet and bake for 45-55 minutes. If the edges of the crust do start to overbrown, wrap the edges in foil for the last 20 minutes or so. This shouldn’t be necessary though if you made the triple thick crust!
10. Be sure to cool this bad boy for at least 3 hours or so (if you want to eat it warm) and serve with a big dollop of whipped cream or maybe a lovely scoop of vanilla ice cream.
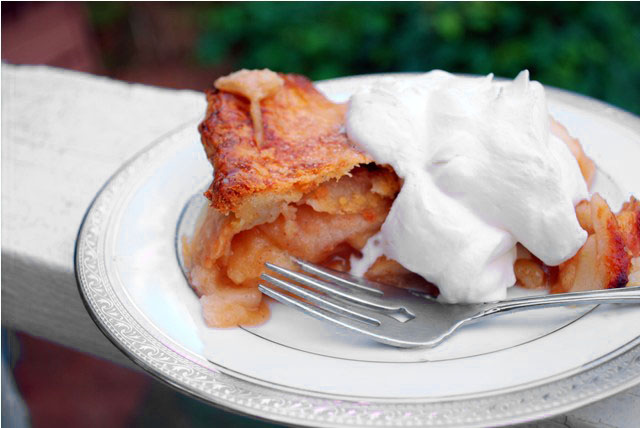
This pie got some seriously rave reviews. These were from family, but mine doesn’t hold back when it comes to critiquing. So I’m going to go ahead and believe them. Go make this pie, you will not be sorry!

Oh and by the way, I think I’m really in love with our new house. I barely had to edit these pictures at all, the light in here is incredible!

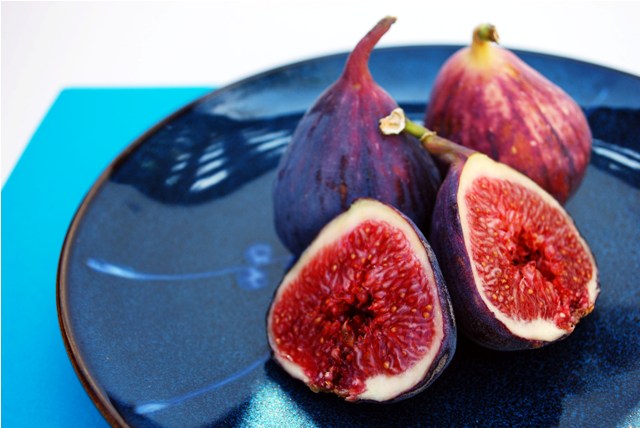
Blogger Secret Ingredient Challenge – Figs, is complete!
So here it is…Sunday night. It’s 9:19pm. Where are all the entries people? Seriously. How many fig recipes did I see on Foodgawker and Tastespotting this week.
Too many to count. I commented on people’s blog posts, tried to coax people into entering our humble little contest. Well, I’m sad to see that previous hosts (Biz not included) have chosen not to enter. Was it the ingredient? Were figs a scary subject? I always thought they were just so perfect, delicious and easy to work with.
Anyhow, I won’t go on a rant, but I am a little dissapointed in the turn out. I won’t take it personally (well maybe a little) but I really thought this would start to get more popular, not less.
Before we get to the awesome prize and next week’s host, let’s get to the awesome foodies who did participate this week! Thank you all who submitted! Great recipes, very hard to choose, especially since there was a common theme among some of your recipes….hmm….
Here are the participants (do please check them all out):
We had a few multiple entries this week, good energy people! Awesome!
Jessica of Johnstone’s Vin Blanc – Fig and Walnut Energy Bars, Fig Bran Muffins and Fig, Smoky Bacon, and Edam Panini
Clarke Thacher (No blog, so no link) – Figs Foster
Catherine of Living the Gourmet – Fresh Figs with Honey and Chopped Nuts & Spaghetti with Baby Spinach, Sun Dreid Tomatoes and Figs
Biz of Biggest Diabetic Loser -Prosciutto Purses Stuffed with Balsamic Fig Goat Cheese
Jess of Jess’s Many Mini Adventures in Food and Farming – Black Tea, Star Anise, Fig Bread
Mary of Food’o Del Mundo – Fig & Prosciutto Pizza
Cari of Can I Get the Recipe? – Fig, Goat Cheese & Prosciutto Rolls
Very hard to decide. So many great combos and some good originality. I’m not going to lie though, I went for the recipe that made me personally start to drool.
And the Winner is…..
Jessica of Johnstone’s’ Vin Blanc!
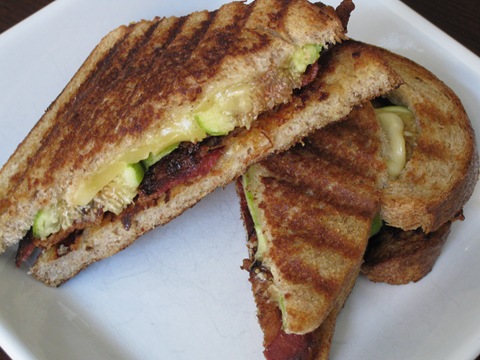
That Smoky Bacon, Fig and Edam Panini would really hit the spot…any time of day. Serisouly, I would eat that for breakfast. So congratulations Jessica! I have to admit, I really would have liked to pick someone else, just based on your location. It’s going to cost me a fortune to send you your gift all the way to NC!!
And here is your prize:
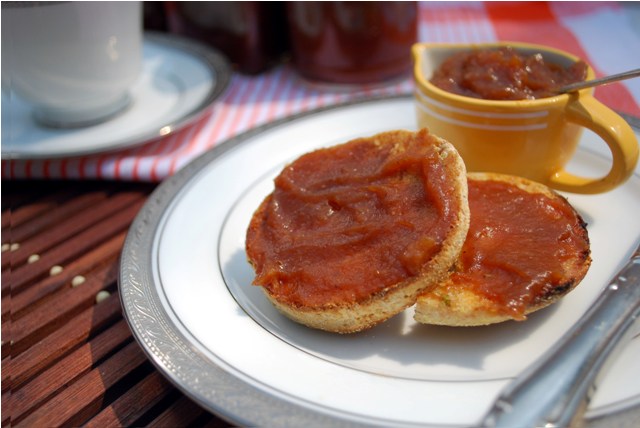
Well, no the English Muffin, or the plates! Those are my wedding china…no, no, the Apple Butter!
I only have one jar left, but in honour of actually giving a prize (and at this point in our move to a new house, it’s all that is available), I thought something homemade (with love) would be agreeable. I hope you like it. E-mail me with your address please so I can send it to you!
And not that this is on purpose, or a trend, or even something the winner has to do, but Jess is also our host for next week! So jump on over to Johnstone’s Vin Blanc for the new ingredient and another week’s challenge!
Thank you everyone for participating. I had a blast judging these entries and look forward to more challenges with you all! Don’t count on me this week though, as I’ll be knee deep in boxes. Good luck to the rest of you though!
Off I go to move first thing tomorrow morning, whew!
Ciao!
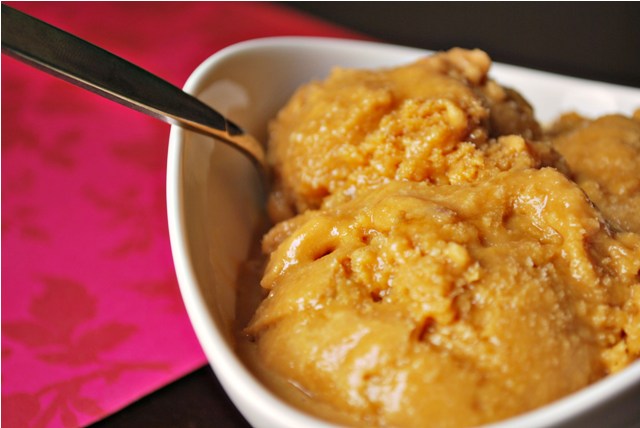
If this recipe has been done before, it is because there is a very good reason for it. This has to be the most intensely flavoured ice cream I’ve ever had. Salty, sweet (y’all know how much Mr. Guilty loves his sweet & salty combos) and smooth as….well, butter. If you’ve never heard of David Lebovitz, first off come out from under that rock, and second get to his website, stat!
Now, I’m a big fan of ice cream, so I guess I’m a teeny bit biased when it comes to judging it. I’ll eat any ice cream, from plain vanilla to the most loaded of rocky roads. Sugar + Cream + Freezer = heaven. Really, what could be better on those hot, sweaty, humid summer days? Or when you’re hitting that late third trimester (ladies? I know you’re with me on this) and you just want to be over and done with the whole fat, pregnant lady thing. Nothing cures the fat, pregnant lady blues like digging into a 6 scoop bowl of full fat ice cream….right? Right? No, that’s just me? Oh, well, I really liked being pregnant, it was a big excuse for eating any and every food that came within 15 feet of my mouth.

Hence the name of this blog. Once I’m staring at that empty, spatula scraped bowl of ice cream (that’s right, I own mini spatulas specifically for this reason), the guilt sets in. Not that it can’t be cured with a few nights of hardcore salad eating. See some of my recipes here and here.
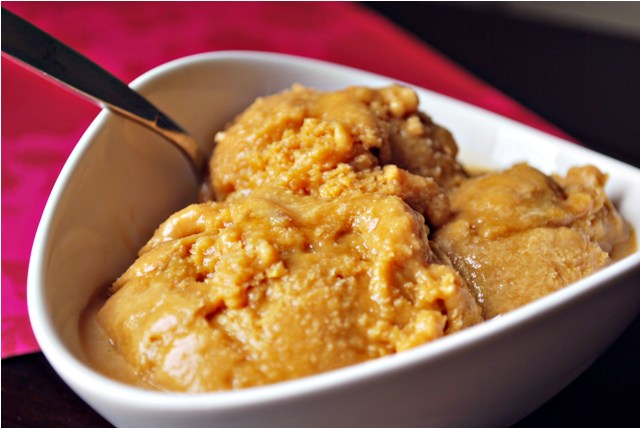
As much as I hate to put out recipes on my blog that aren’t mine, there wasn’t a single revision I could think of for this one. Seriously, what are you waiting for…? Go make this ice cream now! Here’s the direct link to the recipe.
Sorry for all the pictures, but I couldn’t resist, it’s just so pretty!
|

Hi! I'm Elizabeth. I like fitness, bad ass tattoos, food, bacon, chocolate, taking lots of silly pictures and my spawn. Check out my FAQ for all the usual Qs or send me an e-mail and tell me all about your cat and your Aunt Sally's amazing apple pie. |


