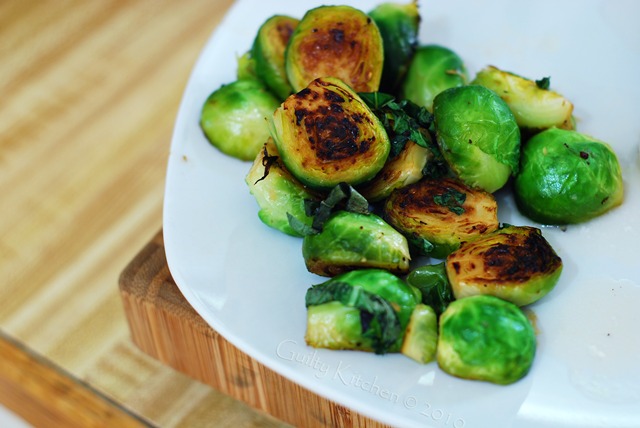
Oh little under appreciated green gem, how I love thee. But oh how I hated thee when I was younger.
I’m sure many of you share the same thoughts on the subject of Brussels Sprouts. These funky little mini cabbages were only brought into our home for Thanksgiving and Christmas and only by special request of my father. They were then steamed to death and served with a wonderful, thick cheese sauce. I hated them.
They were mushy and tasteless and not green anymore, if anything they were merely vessels to transport cheese sauce into my mouth.
Upon working in a fine little Thai restaurant for a year or so, I was introduced to the merits of pan frying or roasting these little suckers. Coated in fish sauce and a lovely brown crust, they were salty, al dente and delicious. I fell in love, but I still did not buy them for my own home for many years.
Upon living with my significant other for a short time though, I came to the realization that I was living with someone who had a bit of an obsession with cruciferous vegetables (broccoli, cauliflower, cabbage, kale, radish, Brussels sprouts, etc.). What was I to do but become obsessed myself? I spent many an evening trying out new recipes, on the BBQ, in the oven, on the stovetop, I left no technique behind.
What I did learn is that I love cruciferous vegetables as vehemently as my husband. We don’t go too long between days filled with one type or another. I urge you to jump on the bandwagon as well, as cruciferous vegetables are among the best cancer fighters out there, and they taste fabulous any which way you can think of.
Here is one of my favourite ways to eat Brussels sprouts.
Pan Roasted Brussels Sprouts
1/2 lb Brussels Sprouts, halved and trimmed of outer leaves and stem
1 clove garlic, minced
1 Tbsp butter
salt & pepper
small handful of basil leaves, chiffonaded
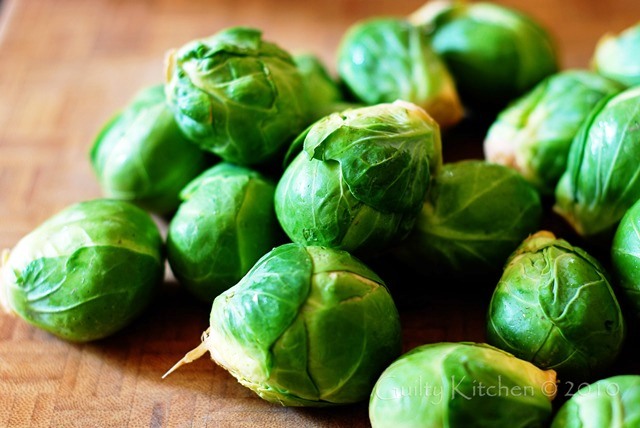
1. Sauté butter and garlic in deep sauté pan over medium heat for 1 minute.
2. Add Brussels sprouts cut side down.
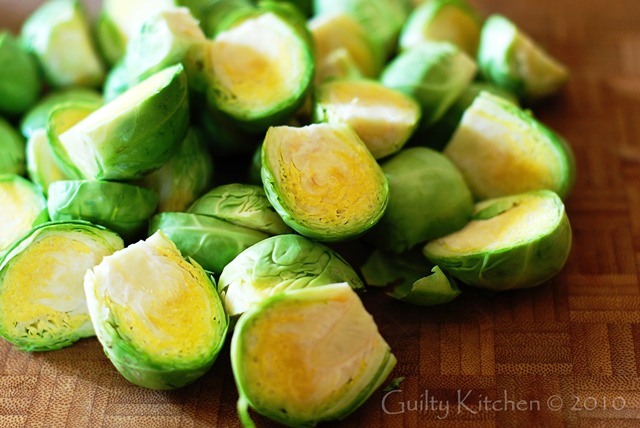
3. Cook on medium heat, covered, for 5 minutes.
4. Uncover, add 1/8 cup water or stock, and recover.
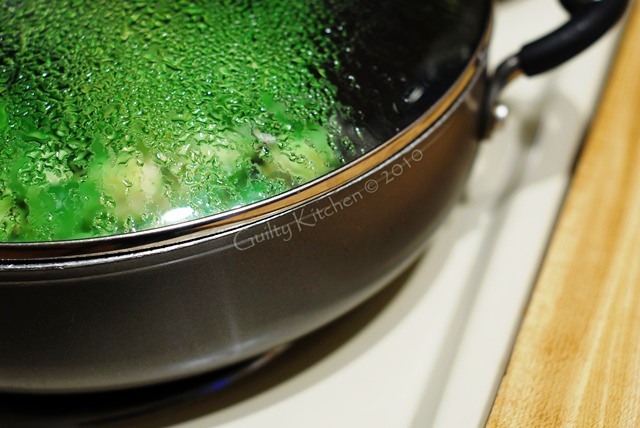
5. Continue to cook for another 5-10 minutes or until sprouts are tender.
6. Add in basil and salt & pepper to taste in last minute of cooking. Serve immediately to prevent discolouration.
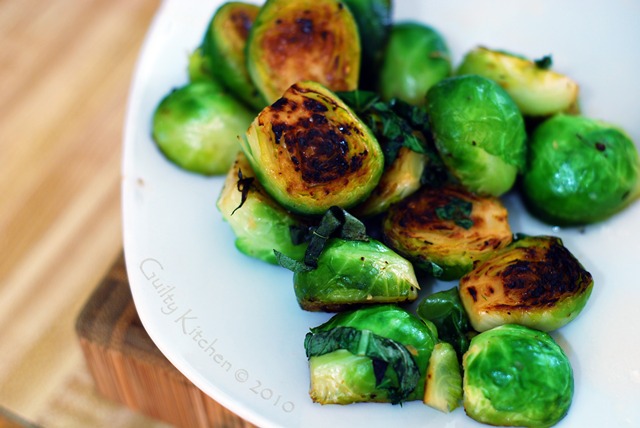
I like mine a little well done than others might enjoy. Just remember to stir to prevent over browning near the end of cooking.
On a completely different note, I just have to say happy birthday to my little man! He turns two today and we will be celebrating like crazy over the weekend! We are having an International themed menu in honour of the Olympics so stay tuned for some of those recipes and pictures from the party!
Side dishes. The forgotten ugly step-sister of your main entrée feature and for the most part, a quickly thrown together afterthought to round out the meal. In my youth, during the barren winter months, this would be a variation on a frozen vegetable theme. French cut beans, corn niblets, peas; zap it for 2 minutes, throw in some butter and voila! Side dish!
Now that I have grown some culinary….uh, intuition, I find that I concentrate on my side dishes much more. The side dish could, in fact, be the star of your meal. A quick soup, thrown together with pantry ingredients, but accompanied by a homemade bread slathered in garlic butter? Please pass the bread. A fine roast of beef, with a lovely gravy served along side a devilish pile of potatoes au gratin? Please pass the potatoes.
You get the idea.
But Beets may not be everyone’s idea of a perfect side dish, and I couldn’t have agreed more until a few years ago. My thoughts were that beets were grown in the ground, and that’s where they should stay. Having had my fair share of pickled beets and borscht as a child, I was not a born fanatic. Besides their lovely colours and variations, I could go forever without eating them. Sadly, my partner in life didn’t feel the same way. He liked beets, pickled even!
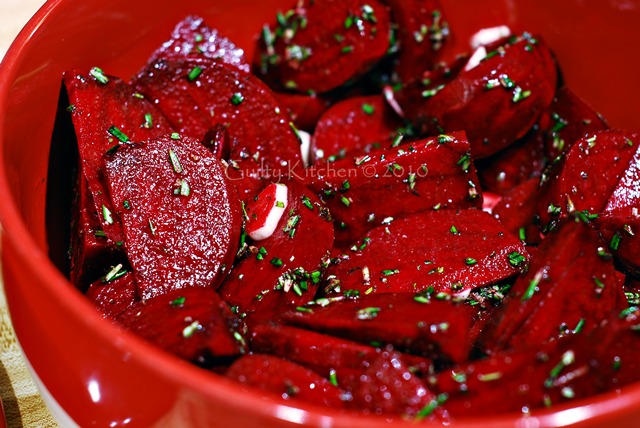
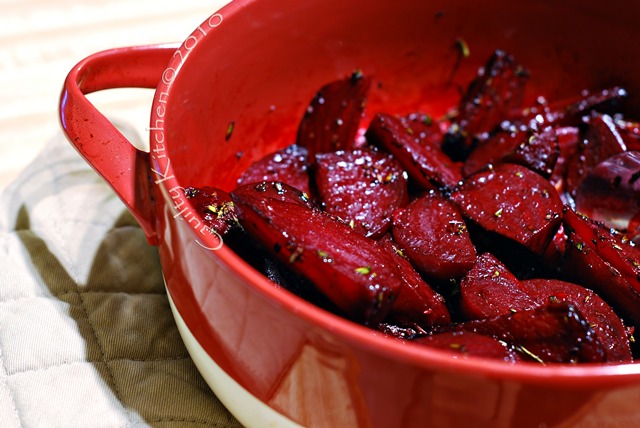
And so it was that I came to buy some lovely fresh, deep crimson coloured beets one year, in desperation of finding a new and healthy side dish I could love. I decided that nothing can taste bad when it is accompanied by garlic and rosemary and caramelized in a very hot oven. How right I was. This has now become a regular staple in the winter and late summer for us, as I could eat the whole dish myself.
I’m a changed woman friends! I no longer shun the little dirty buggers, even those ones swimming in brine at the back of my fridge.
Rosemary Roasted Beets
5 Large beets, tops removed (reserve for another meal!)
4 small sprigs fresh rosemary, minced
2-3 cloves garlic, sliced thin
1-2 tbsp canola oil
salt & pepper
1. Preheat your oven to 400°F.
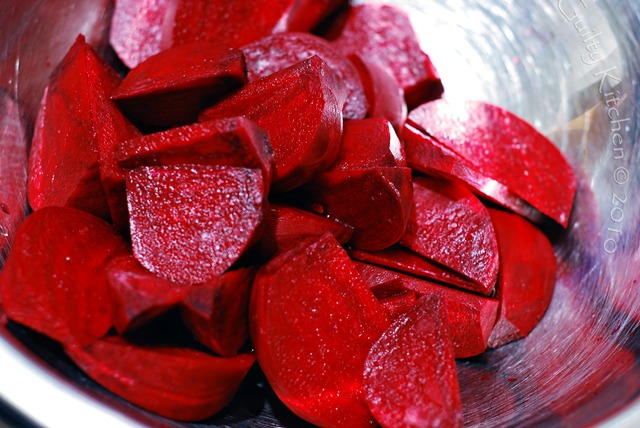
2.Peel the beets. I do this in the sink, with water running slightly. This helps to keep staining of your hands and cutting boards to a minimum. You could also fill the sink and do it under the water. Some people leave the skins on…
3. Cut beets into wedges (each beet should make 8 wedges).
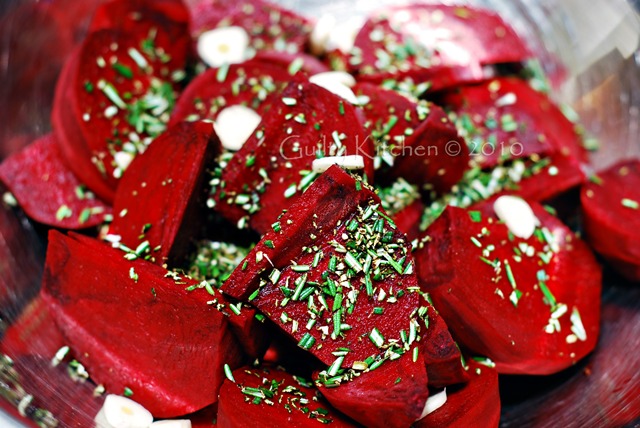
4. In a large bowl, add beet wedges, minced rosemary and sliced garlic. Grind in some fresh salt and pepper and toss to coat.
5. Place in a shallow baking dish and cover. Bake in preheated oven for 30 minutes.
6. Uncover and bake for another 30 minutes. Remove from oven and let stand for a few minutes before serving.
Sometimes I feel pretty lazy. On top of running around with my own toddler, I also watch another little girl three days a week. On top of those two crazy tornadoes, there’s also laundry, endless dishes, cleaning, writing, photographing and too much useless internet surfing to mention. There’s also the newly arrived protruding belly getting in my way every which way I turn, bumping into everything as I waddle by. Waddling already. For shame. Could it be all the cookies, pies, cakes and sweets I’ve been piling into my bottomless pit of a stomach over the past few months? I respectfully decline to answer.
Instead I will expertly avert your attention to the following recipe. A dinner that will satisfy, yet will only take you 20 minutes to throw together. Full of gourmet flavours, satisfying umami, sweet crunchy vegetables and piles of one of the best meats on the planet (one that may or may not be on the banned list of foods during pregnancy). One cannot go wrong serving this to anyone that ambles into your home unannounced, or even a quick meal any time of year.
Today is also the Superbowl. Hooray, rah rah rah. You thought I forgot didn’t you? I never watch the Superbowl though, if I do it’s only for the commercials. Why? 1) Because I’m Canadian and It’s not really that big of a deal here and 2) We have our own Superbowl for our CFL, the Grey Cup which happens in November.
When we watch the Grey Cup, we always make lots of finger foods or homemade pizza though, as it’s fun to have people over to watch the “Big Game”. I’d say, in this household, there’s a lot more hockey watching than football, but we are in Canada after all!
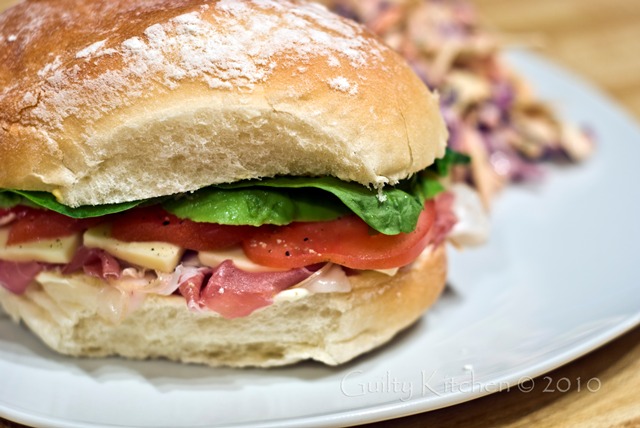
As an easy dinner for any of these nights, a big, filling, meaty sandwich will not only fill the void, but will satisfy even the pickiest of sport watchers. I like to pile it high with meat and cheese, balancing everything else on top of that. Fell free to switch any of the ingredients for something you prefer. It’s more of an idea, than a recipe anyway.
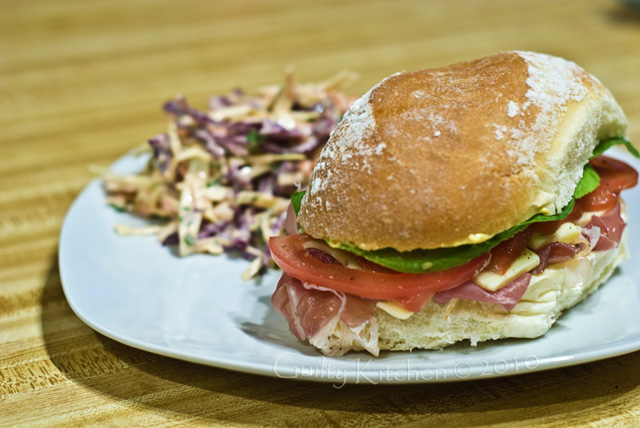
Prosciutto Sandwiches
2 Portugese style buns
Real mayonnaise
Grey Poupon or Dijon mustard
slices of roasted garlic Havarti cheese
150g prosciutto, thinly shaved
2 roma tomatoes, sliced
1/2 an avocado, sliced
torn pieces of romaine lettuce
small handful of spinach leaves
1. Assemble your manly sandwich: Slather some condiments onto your buns (mayo and mustard), layer on the meat, cheese, tomatoes (salt & pepper) avocado and greens
2. Finish with top of bun. Serve with fresh coleslaw on the side.
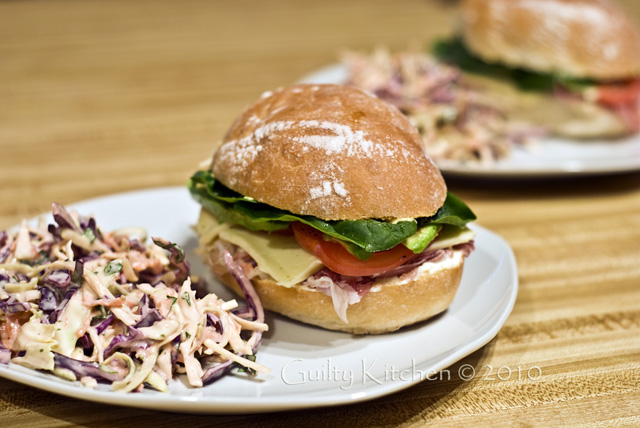
And just for fun, go Colts!
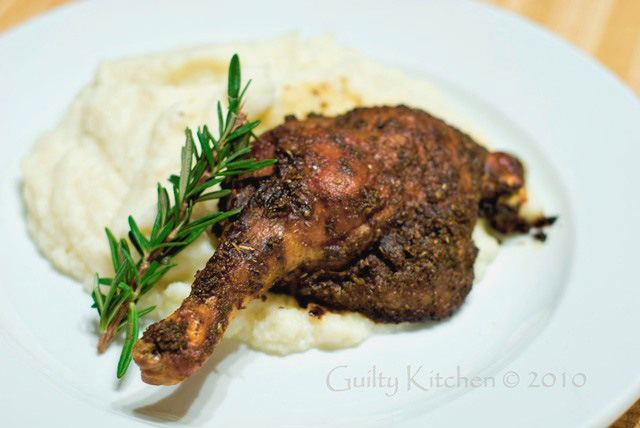
I’m gettin’ fancy pants today here in the Guiltiest Kitchen around. BUT, I am attempting to reduce the guilt, as usual.
Sometimes, Mr. Guilty will be strolling through the meat department and out of the corner of his eye, he will catch a glimpse of something that must be had. Sometimes it is giant pork butt roasts so big they take up a whole grocery bag, other times they are large hermetically sealed packages of corned beef, and just sometimes, they are divine, plump little duck legs. Most of the time, I give him a quirky smile and tell him that it’s not on the menu, therefore not in the budget and we can’t buy it. Well, lately, hormones have been taking over. If he shows me something I know is bad, bad, bad food (Cheese Pleasers anyone?), I just can’t help myself. “Throw it in the cart!” I’ll mumble whilst racking my brain for appropriate recipes.
That is how we come to this recipe. Duck is a relatively inexpensive buy at our local grocer, but after considering the amount of fat that will cook off of it, one duck will feed the two of us. I always save the fat to cook with later, but we’ll talk about those adventures another time.
Duck legs can be bought individually and are a great addition to the family rotation. More flavourful than chicken, and almost entirely made up of dark meat, it is a favourite in this family. They do take a bit longer to cook, mind you, but it is well worth the effort.
Finding an appropriate side dish is sometimes a struggle for me, as I am always concentrating on the main dish. I have seen many recipes for mashed cauliflower or faux mashed potatoes, and almost all of them simply replace potatoes with cauliflower. They still use all the butter, cheese and cream in the world to make it taste more closely to the familiar mashed potato. I suspect though, that most people who are making mashed cauliflower instead of potatoes are trying to find healthier alternatives to the usually calorie and fat laden side dish. Which is why I finally tried making it again. I had made it once before using butter and a potato masher. What I came out with was soggy, smallish chunks of cauliflower bathed in butter. Delicious, but not at all similar to mashed potatoes in taste or texture.
This will now be my new healthier potato alternative for future meals needing starchy compatriots. It was amazingly easy and delicious without all the extra fat!
Slow Baked Duck Legs
2 Whole duck legs, bone in, skin on (thigh and drumstick)
1 tsp each dried oregano, marjoram, basil, rosemary and paprika
3/4 tsp each garlic powder and seasoning salt
2 Tbsp vegetable oil
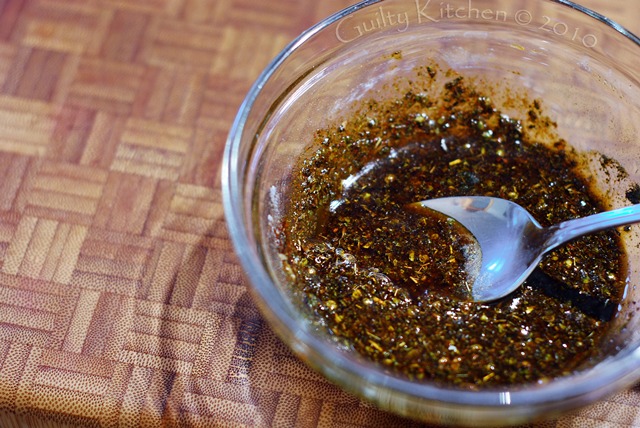
1. Preheat oven to 400°F. In a small bowl, mix together all ingredients (except duck legs) to form a spice rub.
2. Line a baking tray or roasting pan with aluminum foil and spray lightly with baking spray or rub with oil or butter. You could do this without aluminum foil, but I guarantee you will regret it come dish washing time.
3. Rub each leg with spice rub, making sure you get it in every nook and cranny.
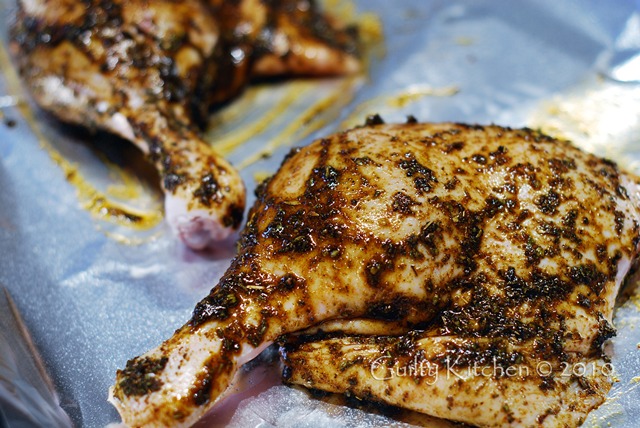
4. Place on baking tray and cover lightly in another layer of aluminum foil, slightly tented or the lid of your roasting pan.
5. Bake covered for 45 minutes.
6. Turn oven down to 350°F, uncover the duck legs and return to oven for another 50-60 minutes.
7. Remove from oven and let rest 5-10 minutes before serving.
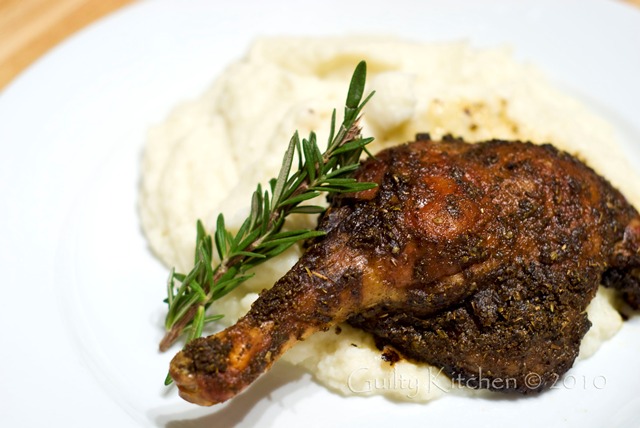
8. Serve on a bed of mashed cauliflower (recipe follows).
Mashed Cauliflower (or Faux Mashed Potatoes)
1 medium to large sized head of cauliflower
1/3 cup light sour cream (or full fat)
2 cloves of roasted garlic (if you are making this with the duck, just throw it onto the baking tray for 15-20 minutes)
chicken stock
salt & pepper
1. Cut cauliflower into small florets and pack into steam tray over a pot of boiling water. Drain very well when done.
2. Steam for about 8 minutes to make it tender enough to mash.
3. In order to achieve a potato-like consistency, you will need to use a food processor for this next step, a potato masher just will not do!
4. In bowl of food processor, add cauliflower, sour cream and roasted garlic cloves.
5. Whirl until everything is annihilated, fully and completely, lumps are extremely undesirable in this dish…
6. Add salt and pepper to taste and enough chicken stock to make it the consistency you are used to.
7. At this point, if you don’t care about the health values of swapping potatoes for cauliflower, go ahead and drown it in butter, Parmesan and cream. Yum!
Welcome to a new and improved, more stream lined version of Guilty Kitchen. I’ve taken away some of the clutter on the sidebars and added a navigation bar at the top of the page to make finding everything you need just a little bit easier.
If you are one of the many people who use the print function that used to be (annoyingly) at the top of every page, you can now find it at the bottom of each post, located in the gray bar with the comments and date/time. I really hope you like it, because it took me a whole day of blood, sweat and tears. But mostly just tears. Let’s just say I’m not a technical wizard, I usually leave that up to the Mr.
On a completely different note, you might have noticed a sweet little icon up there in the top left column, “Simple Bites Contributor”. Well, the cat’s out of the bag, let’s say. I, along with six other amazing talents, are about to embark on a whole new adventure together. I will be regularly writing a column for Simple Bites and contributing as much to the conversation as I can. My posts on Guilty Kitchen will not be affected at all, so not to worry my faithful readers! You can’t get rid of me that easily.
Watch for our launch on February 8th, and for my first contribution on February 11th. I’m very excited and I hope you are too!
This recipe today is a fabulous vegetarian and gluten free meal. If you are unfamiliar with quinoa, you should get yourself out to your local health food or grocery store as soon as humanly possible. Quinoa is a very ancient grain, having originated in South America some 6000 years ago. It has a balanced set of essential amino acids making it a great complete protein source (unlike other grains), so it is an ideal choice for vegetarians and vegans.
I find the taste is nutty and complex, with a texture similar to rice, but smaller. It is quite easy to cook and does not require anything special to make it delicious. Just remember to rinse before cooking, as quinoa is covered in what is known as saponin, which can make it taste soapy or bitter. An hour long soak or a few rinses will take care of it though.
If you haven’t tried quinoa yet, I challenge you to try replacing your next rice meal with quinoa, I guarantee you will be pleasantly surprised by how tasty it is.
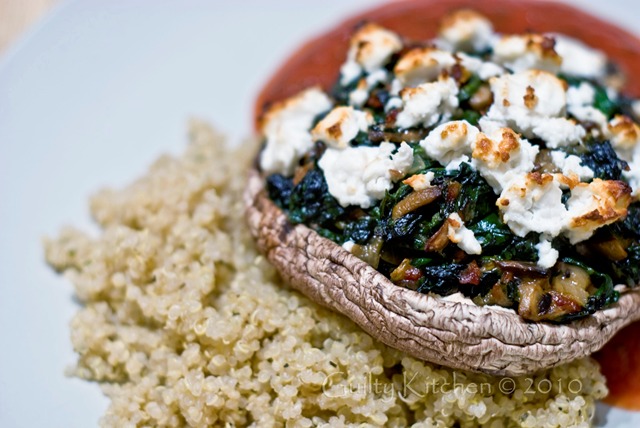
Stuffed Portobello Mushrooms
Yield: 2 servings
2 large portobello mushrooms
1/2 small onion, diced
1 clove garlic, minced
2 Tbsp butter
1/4 cup sun dried tomatoes, chopped
2 crimini mushrooms, diced
8 oz baby spinach leaves, roughly chopped or torn
75g goat feta
1/3 cup Parmesan cheese, shredded
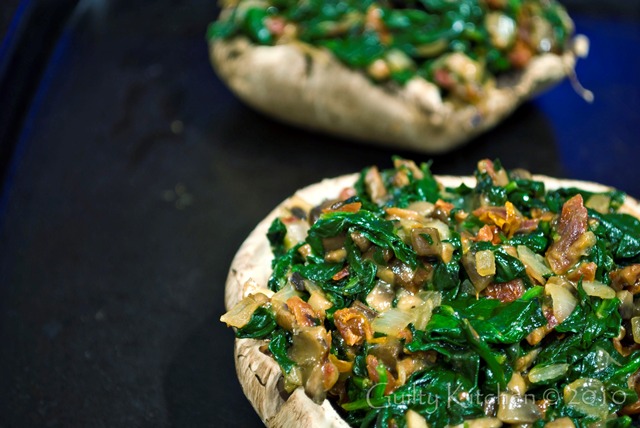
1. Sauté 1 Tbsp of butter with onion and garlic in sauté pan on medium heat until onions begin to turn translucent.
2. Remove stems from portobellos and chop. Add tomatoes and diced mushrooms (including stems) to onions and sauté for 5 minutes.
3. Add second Tbsp of butter to pan and add in spinach leaves. Sauté until completely cooked, remove from heat and stir in Parmesan cheese. Set aside.
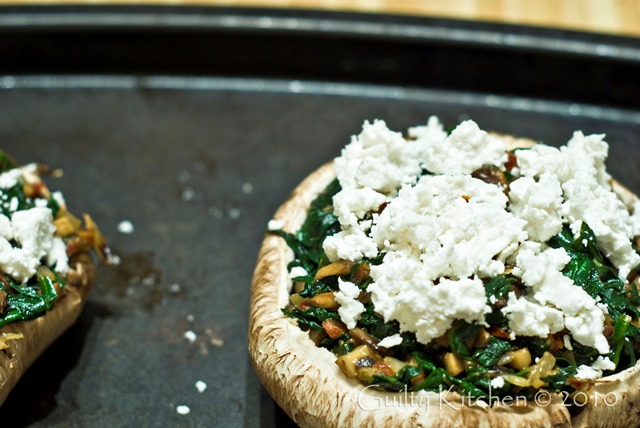
4. Place portobello caps on baking tray and pile spinach mix into them equally. Top with crumbled goat feta and bake in a 375°F oven for 20-25 minutes.
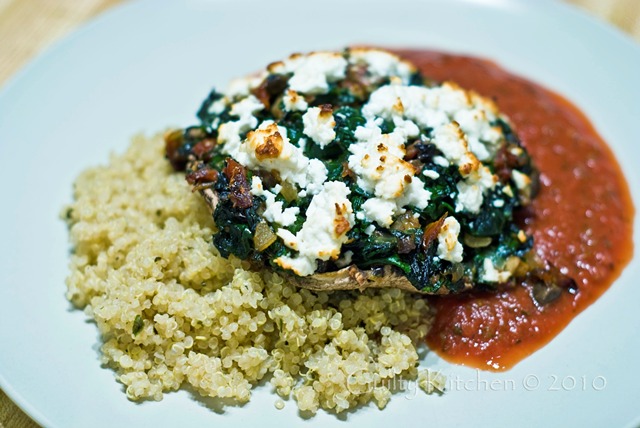
5. Serve on a bed of Quinoa and tomato sauce (recipe follows).
Quinoa
1 cup quinoa
1 1/2 cups stock or water
1/2 tsp salt
1/2 tsp basil, oregano and black pepper
1 Tbsp butter
1. Rinse quinoa three times with plain water, draining as much as possible.
2. In medium saucepan mix quinoa, stock, salt, herbs and butter.
3. Bring to boil, cover and lower to simmer for 15-20 minutes.
4. Remove from heat and allow to rest 5 minutes, fluff with fork before serving.
Quick and Easy Tomato Sauce
1 clove garlic, minced
1 Tbsp canola oil
1 213 ml can of tomato sauce
1 tsp each of oregano, basil and marjoram
1. Heat oil in small saucepan, add garlic and stir for 1 minute.
2. Add tomato sauce and herbs.
3. Bring to a simmer and cook for 10-15 minutes.
4. Serve with portobellos.
I would also just like to dedicate this meal to my favourite aunt Barbara, who passed away in May of 2005. She was a great influence on my life and will always be remembered for her great love of food, drink, family, friends and great times. February 2nd would have been her 60th birthday and I just know it would have been a ruckus good time. I wish I could have made something a little more fantastic, but I know she appreciated even the littlest things, and every year I just like to make mention of her so that none of us ever forget. Here’s to you Barbara, cheers! We all miss you very much!
|

Hi! I'm Elizabeth. I like fitness, bad ass tattoos, food, bacon, chocolate, taking lots of silly pictures and my spawn. Check out my FAQ for all the usual Qs or send me an e-mail and tell me all about your cat and your Aunt Sally's amazing apple pie. |


